BrowserAct Output Data Node — Beginner's Guide

Master BrowserAct's Output Data node to collect, consolidate, and export workflow data seamlessly. Transform scattered extraction results into structured formats like CSV, JSON, XML, or Markdown.
What is the Output Data Node?
The Output Data Node is the final endpoint of your workflow. It collects and consolidates all data extracted during workflow execution from various Extract Data nodes, then exports everything in your chosen format.
When Should You Use It?
Use the Output Data Node whenever you need to:
- E-commerce Data Collection:product titles, prices, ratings, and images from marketplace listings
- Job Market Research: Collect job titles, descriptions, salary ranges, and requirements
- News & Content Aggregation: Capture headlines, full text, publication dates, and author names
Key Rules & Best Practices
Before you start, remember these essential rules:
- One per workflow: Each workflow can have only one Output Data Node
- Must be last: The Output Data Node must always be the final node in your workflow
- Requires data source: You need at least one Extract Data node before the Output Data Node
How to Set Up an Output Data Node (Step by Step)
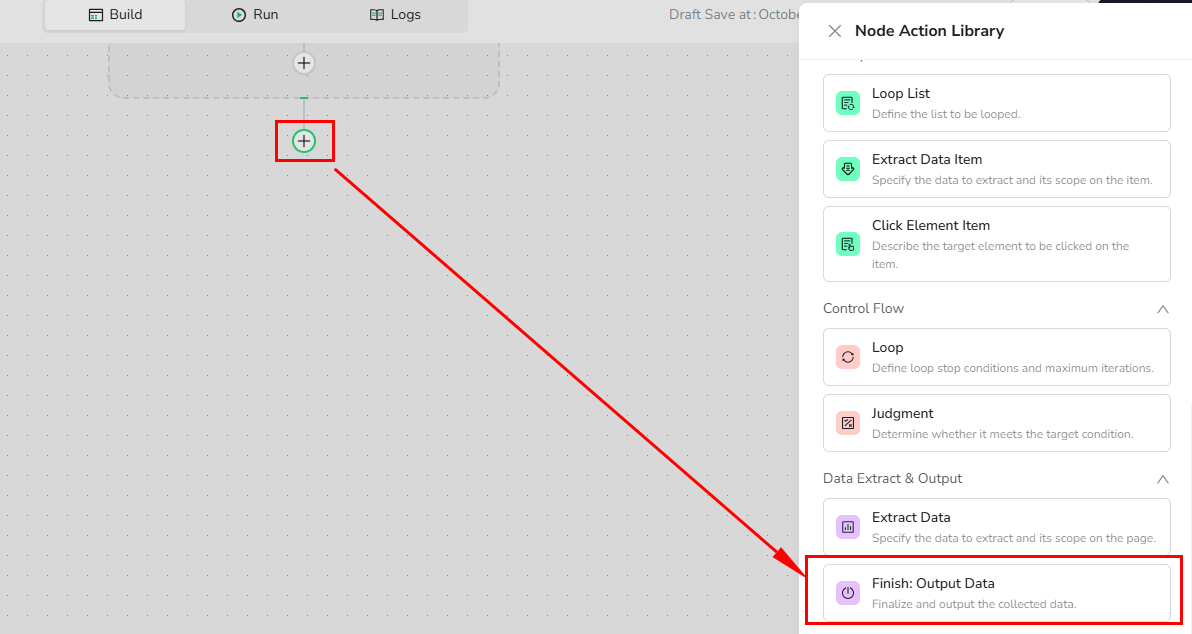
Step 1: Insert the Node
Click the [+] button,Select "Output Data Node" from the node library
Important: This must be your workflow's final node. You cannot add nodes after it.
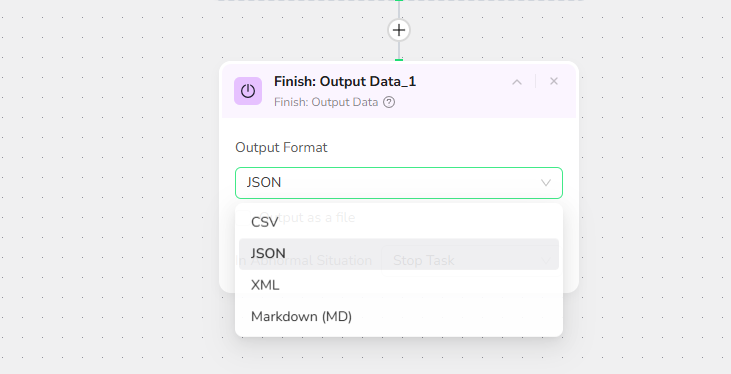
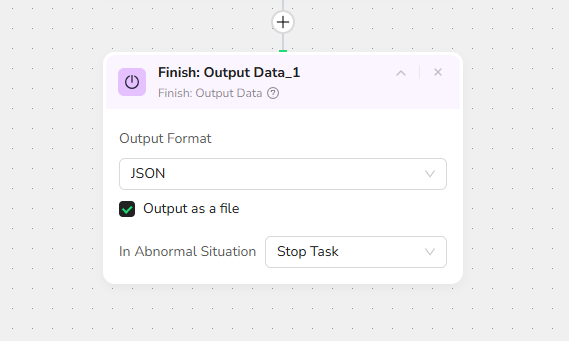
Step 2: Choose Your Output Format
Select the format that best suits your needs:
JSON - Best for API Integration
- Use when: Connecting to other systems, APIs, or databases
CSV - Best for Spreadsheets
- Use when: Creating reports, importing to Excel/Google Sheets
XML - Best for Enterprise Systems
- Use when: Integrating with enterprise software, standardized data exchange
Markdown (MD) - Best for Readable Reports
- Use when: Creating human-readable documentation or reports
Step 3: Configure Export Settings
Enable File Download (Optional)
Check the "Output as file" option if you want to:
- Download the data directly to your computer
When enabled, you'll get a download button after workflow execution completes.
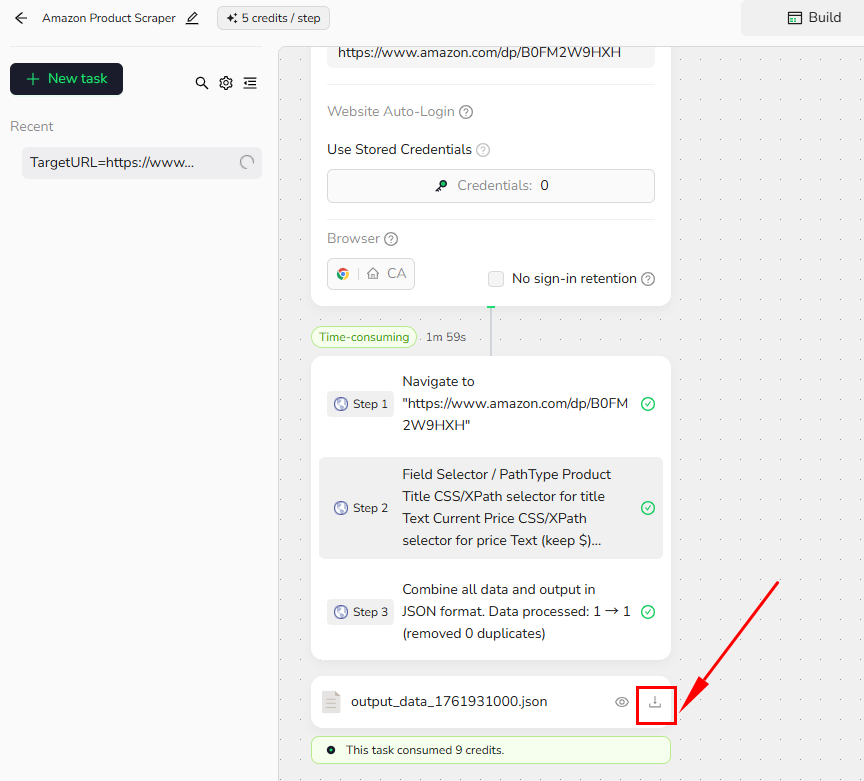
Example Workflow: Amazon Product Scraper
This Amazon Product Scraper is designed to extract comprehensive data from one product page at a time.
For bulk product monitoring and automated competitor alerts, combine this workflow with Make.com—allowing you to loop through multiple products and schedule recurring price checks effortlessly.
1.Start Node Parameter Settings
Target_URL: Enter your Amazon product URL
Example:"https://www.amazon.com/dp/B07PXGQC1Q"
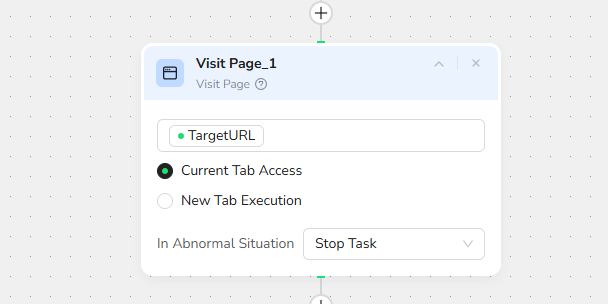
2.Add Visit Page
Reference the Target_URL parameter by typing / in the input field.
3.Add Extract Data Node
Data Field Prompt:
Field Selector / PathType
Product Title
CSS/XPath selector for title
Text
Current Price
CSS/XPath selector for price
Text (keep $)
Original Price
CSS/XPath selector for original price
Text
Availability
CSS/XPath selector for availability
Text
Star Rating
CSS/XPath selector for rating
Text
Review Count
CSS/XPath selector for review count
Text
Product URL
Use the input URL
Text
Seller Name
CSS/XPath selector for seller
Text
Shipping Info
CSS/XPath selector for shipping
Text
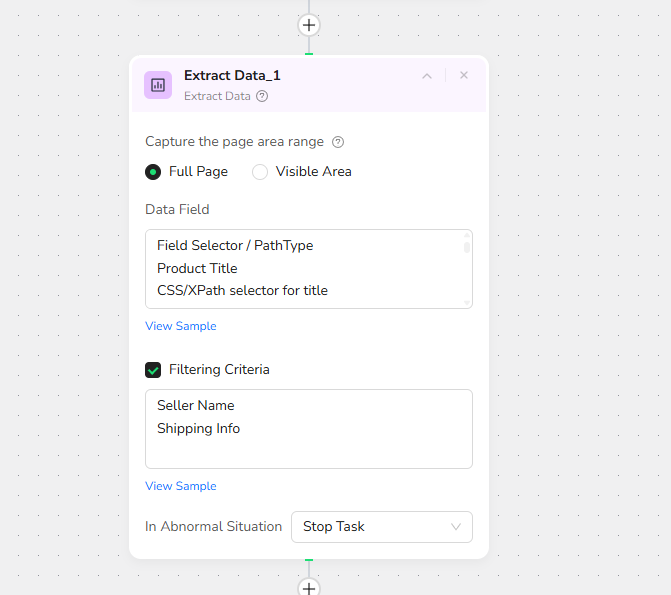
Filtering Criteria:
- Seller Name
- Shipping Info
4.Add Output Data
Export in JSON formats. Perfect for API integration and data processing.
Quick Review
- Can you have multiple Output Data nodes in one workflow?
- No, only one per workflow
- Where must the Output Data Node be positioned?
- Always as the last node in the workflow
- Which format should you choose for Make.com or N8N integration?
- JSON format is recommended
- What happens if no Extract Data nodes exist before Output Data?
- The output will be empty—you need at least one data source
Need Help?
· Check our documentation for more automation tips
· Join our Discord community for live support
· Email us at support@browseract.com

Relative Resources


Latest Resources

BrowserAct vs Skyvern: Open-Source Browser Agent vs Managed Workflow

BrowserAct vs Selenium in 2026: Is It Time to Move On?

BrowserAct CAPTCHA Handling vs 2Captcha vs CapSolver: Real Cost Comparison
