BrowserAct Loop Node — Beginner's Guide

Master BrowserAct's Loop Node to automate repetitive web scraping tasks with precision. Learn how to set exit conditions, handle nested loops, and integrate with other nodes for efficient batch processing. Perfect for pagination, infinite scroll, and multi-page data extraction workflows.
What is Loop Node?
The Loop Node is BrowserAct's iteration engine that repeats specified actions until a condition is met. Unlike manual repetition, it automatically executes tasks like pagination, data collection, or element clicking in a controlled manner. It supports both simple fixed-count loops and intelligent condition-based exits, making it essential for any workflow requiring repeated operations.
When Should You Use It?
Use the Loop Node when you need to:
- Extract data across multiple pages (for example, scraping 50 job listings that span 3 pages of search results)
- Repeat actions until a condition is met (like collecting products until you have 100 items or until "Load Complete" appears)
- Handle infinite scroll pages (such as continuously scrolling and extracting content until no new data loads)
- Process dynamic content iteratively (like repeatedly clicking "Show More" buttons to reveal hidden content)
Core Features
1. Simple Iteration
Execute actions a fixed number of times without complex logic:
- Default: 10 iterations
- Maximum: 999 iterations
2. Condition-Based Control
Stop loops intelligently based on:
- Data count: "Until 50 products are collected"
- Page elements: "Stop when 'No more results' appears"
3. Seamless Integration
Works perfectly with other nodes:
- Next inside Loop List for multi-level iteration
- Combine with Pagination for automatic page navigation
- Pair with Wait nodes for dynamic content loading
How to Set Up a Loop Node (Step by Step)
1.Add the Loop Node
Click the + button in your workflow, then select "Loop" from the node library.

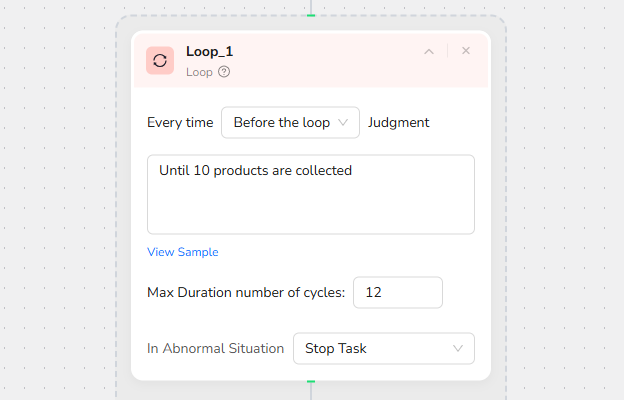
2.Configure Loop Exit Condition
Define when the loop should stop using natural language or parameters:
Dynamic Parameter Reference:
Type / to reference variables like {{date_limit}} for flexible control.
3.Set Maximum Iterations
Specify the upper limit to prevent infinite loops:
- Default: 10 iterations
- Maximum: 999 iterations
- Best Practice: Set realistic limits based on your data needs
Example: If you expect 50 items across 5 pages, set max iterations to 10 as a safety buffer.
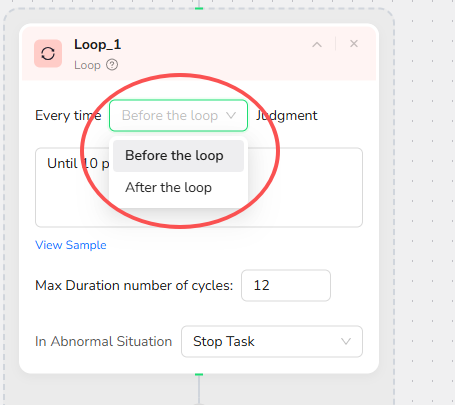
4.Choose Condition Check Timing
Before Loop (Default):
- Checks condition before executing the loop body
- Stops immediately if condition is already met
After Loop:
- Executes loop body first, then checks condition
- Guarantees at least one execution
5.Handle Errors
Configure what happens when the loop encounters an error:
Stop Task:
- Halts the entire workflow immediately
- Use when loop success is critical
Skip Iteration:
- Skips the current iteration and continues to the next
- Use for fault-tolerant workflows where some failures are acceptable
6.Add Child Nodes
The Loop Node requires at least one child node to execute:
Common child nodes:
- Extract Data — Collect information on each iteration
- Click Element — Interact with page elements repeatedly
- Pagination — Navigate to next page
- Wait — Handle dynamic loading between iterations
Loop Condition Best Practices
Correct Examples
- Until 10 products are collected
- Until {{date_limit}} products are collected
- Stop when 'Load Complete' appears at page bottom
- Continue until 'Next Page' button is disabled
Incorrect Examples
- Infinite loop to extract all data
- Stop at iteration 5 and export data to Excel
- When there is no new data, stop loop and click 'Back to Home
Real-World Example: Himalayas Job Details Scraper
Before You Begin
Determine the number of job listings and their categories to retrieve.
This example extracts 50 job listings from the Himalayas Customer Service search results. After applying this template, you can adjust it to suit your needs.
1.Start Node Parameter Settings
- Set up Datelimit parameter: the number of job listings to extract (e.g., "50")
- Note: You can adjust this value based on your needs.

2.Visit Page
Enter the target URL to navigate to Himalayas: "https://himalayas.app/jobs/customer-service"
Note: You can replace these URLs with any Himalayas search results you want to scrape. Use filters like job type, location, or keywords to narrow your search.

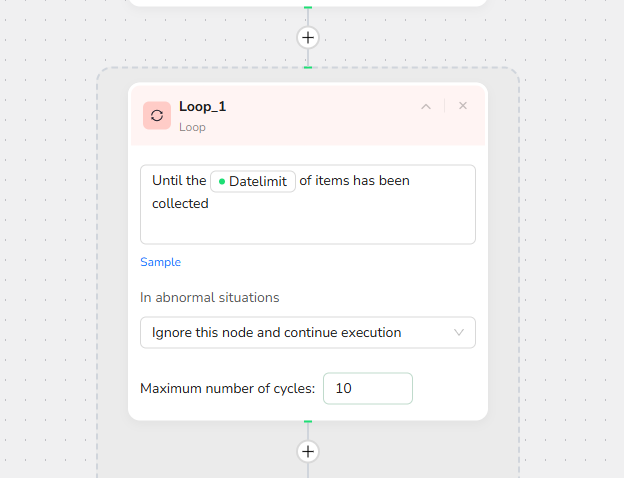
3.Add Loop Node:
Input Loop Stop Condition: Until the {{datelimit}} of items has been collected.
Note: If you need fewer jobs than appear on one page (e.g., extracting 10 jobs when the page displays 23), You don't need to set this node
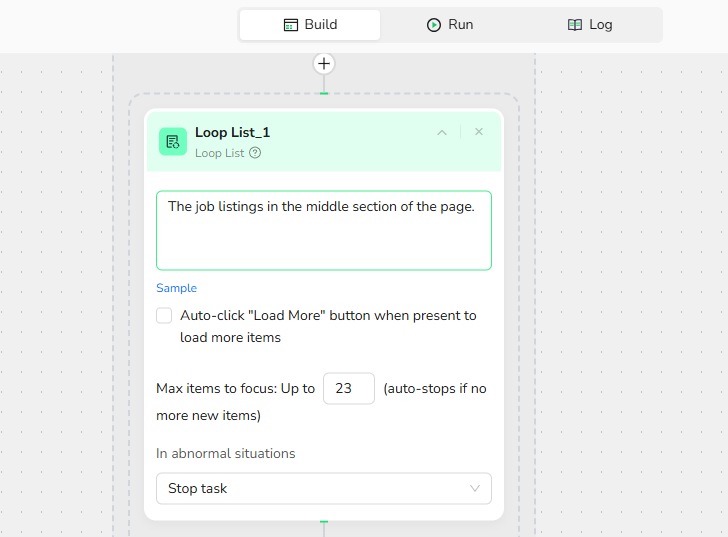
4. Add Loop List Node:
- List Region Description: The job listings in the middle section of the page.
- Load More: Unchecked.
- Max Focused Loop Items: 23 (based on page Item count).
Note:Count the actual number of job listings visible on the current page and enter that value here to ensure complete data extraction without gaps.
5.Add Click Element Item:
Click the title link in the current focused job Item.
6. Add Extract Data:
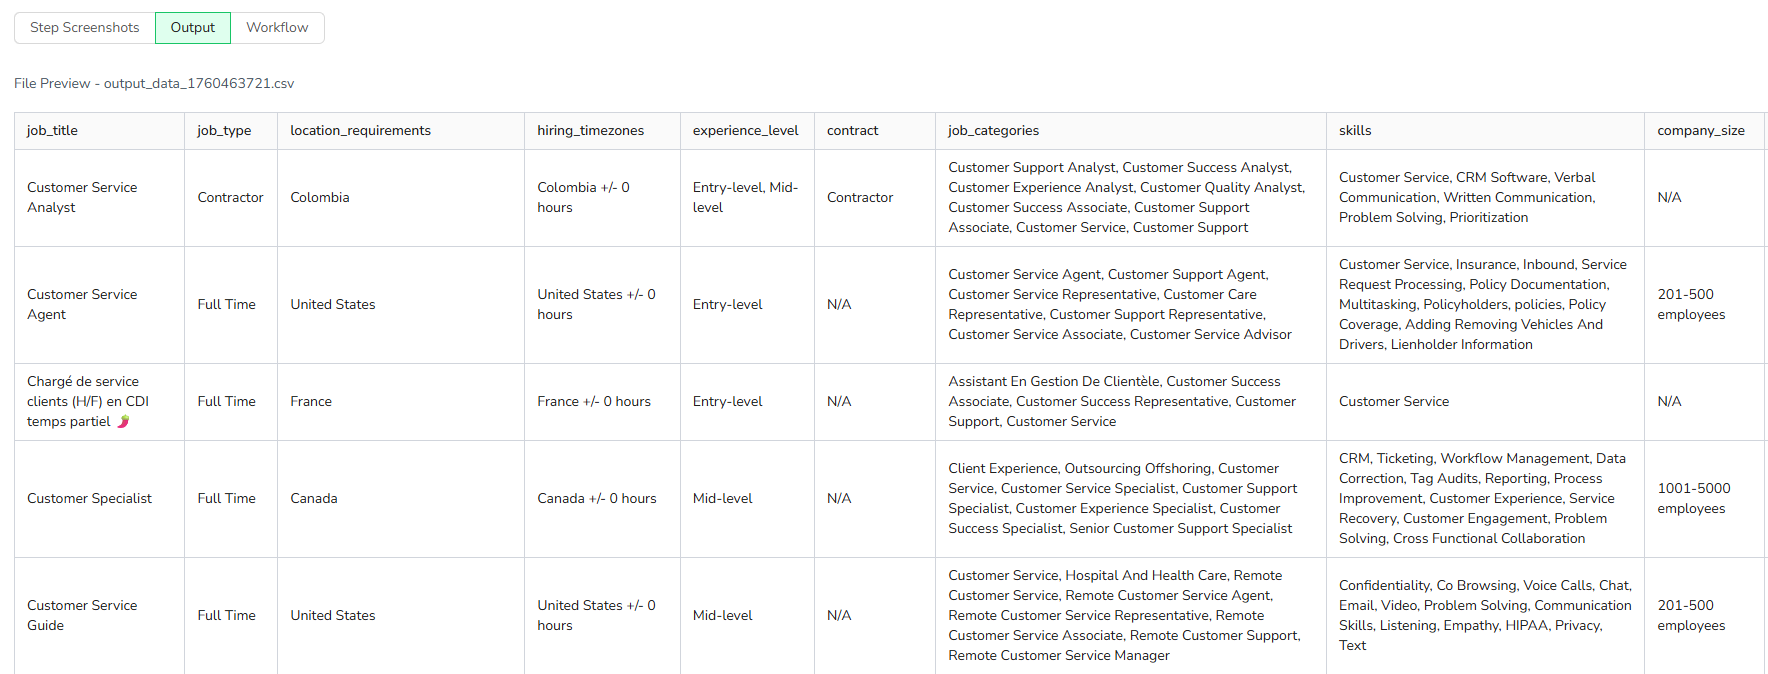
Data Field: Extract the information including the following fields in “the About the job” area from the job details page: Job Title, Job Type, Location Requirements, Hiring Timezones, Experience Level, Contract, Job Categories, Skills, Company Size, Company Name.

7.Add Pagination:
Select "Next page" to handle multi-page navigation.
8.Output Data
Choose from multiple format options to suit your needs:
- JSON - Perfect for job board integrations and preserving hierarchical data structures.
- CSV - Ideal for Excel, Google Sheets, ATS systems, and HR analytics tools.
- XML - Great for enterprise recruitment systems and legacy applications.
- Markdown (MD) - Easy-to-read format for documentation and job market reports.
Advanced Tips & Best Practices
Tip 1: Always Define Clear Exit Conditions
Do:
Until 50 products are collected
Loop 10 times then stop
Stop when 'No results' text appears
Don't:
Extract all data infinitely
Keep looping until done
Tip 2: Use Dynamic Parameters for Flexibility
Use parameters:
Until {{item_limit}} items are collected
Tip 3: Test with Small Loop Counts First
- Start with Max Iterations: 2 to test workflow logic
- Verify data extraction works correctly
- Increase to Max Iterations: 5 for broader testing
- Finally set to production value (e.g., 20)
Loop Node vs Loop List — When to Use Each?
Use Loop Node when:
- Repeating the same action multiple times (e.g., pagination)
- Condition-based exit needed (e.g., "until 50 items collected")
- Iterating through pages rather than specific elements
Example: Paginating through search results
Use Loop List when:
- Iterating through a specific list of elements (e.g., product cards)
- Each iteration needs to focus on a different element
- Extracting data from visible list items
Example: Extracting details from each product card on a page
Use Both Together when:
- Multi-level iteration needed (e.g., pages + items per page)
- Combining pagination with item-level extraction
Example: Extracting job details from multiple pages of listings
Quick Review Questions
- What is the maximum number of iterations a Loop Node can execute?
- What happens if you don't specify an exit condition?
- When should you use "Before Loop" vs "After Loop" condition checking?
- How do you reference a parameter in a loop condition?
- What's the difference between "Stop Task" and "Skip Iteration" error handling?
Need Help?
- Check our documentation for more automation tips
- Join our Discord community for live support
- Email us at support@browseract.com

Relative Resources


Latest Resources

BrowserAct vs Skyvern: Open-Source Browser Agent vs Managed Workflow

BrowserAct vs Selenium in 2026: Is It Time to Move On?

BrowserAct CAPTCHA Handling vs 2Captcha vs CapSolver: Real Cost Comparison
