BrowserAct Input Text Node—Beginner's Guide

Master BrowserAct's Input Text node to automate form filling and search queries. Simulate text input into search bars, message boxes, and form fields with natural language descriptions. Learn features, setup rules, and real-world examples to streamline repetitive data entry tasks efficiently.
What is the Input Text Node?
The Input Text node helps you automatically type text into input fields—like search boxes, contact forms, or message fields—so you can submit queries, fill out forms, and interact with web pages without manual typing. It works anywhere within the visible area of your browser and is perfect for automating repetitive data entry tasks.
When Should You Use It?
Use the Input Text node if you need to:
- Fill search boxes with keywords (like entering "customer service" in a job search bar to filter results)
- Submit queries across multiple pages without retyping (such as searching different products on e-commerce sites)
- Enter messages or information into text fields (like typing messages in Facebook's message box)
- Automate form completion with dynamic data (such as filling registration forms with user information)
How to Set Up Input Text (Step by Step)
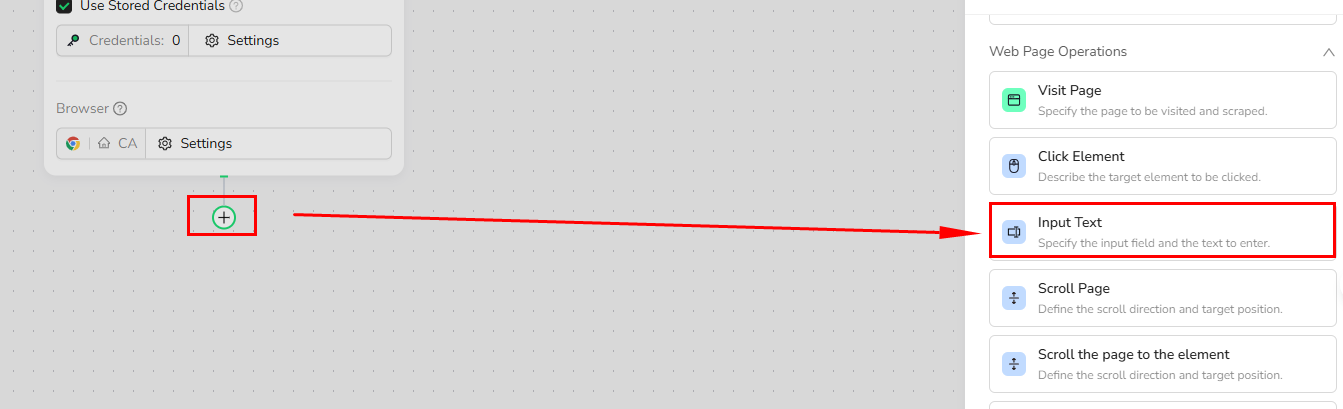
1.Add Input Text Node
In your workflow, click the + button and select "Input Text" from the node options.
2.Configure the Input Text Settings
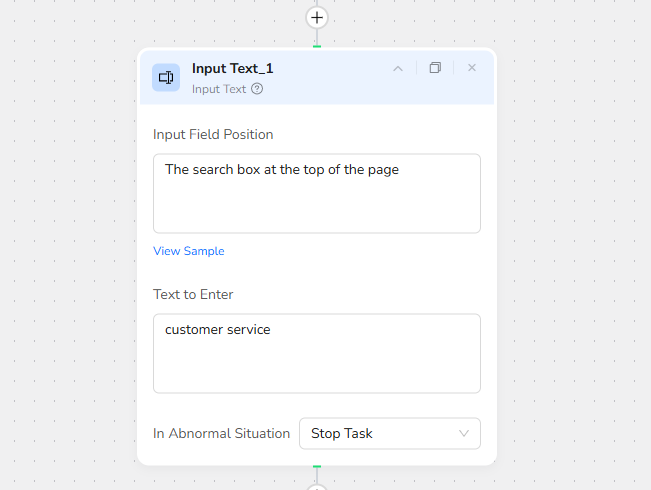
Input Box Description: Describe where the input field is located using natural language.
Example prompts:
- "The search box at the top of the page"
- "The message input field at the bottom right corner"
- "The email address field in the registration form"
Text Content: Specify what text you want to enter.
Example inputs:
- "customer service"
- "Hello, I'm interested in your product"
- Use "/" to reference parameters for dynamic content (e.g., {{product_name}} or {{user_email}})
The node will identify the input field you describe within the visible area and automatically type your specified text.
3.Run Your Workflow
When the workflow runs, the Input Text node locates the described input field, clears any existing content, types your specified text, then moves to the next step in your automation.
Example: YouTube Comments Scraper
Before You Begin
This example focuses on 10 YouTube videos and extracts 50 comments from each qualifying video.
You can adjust it according to your needs!
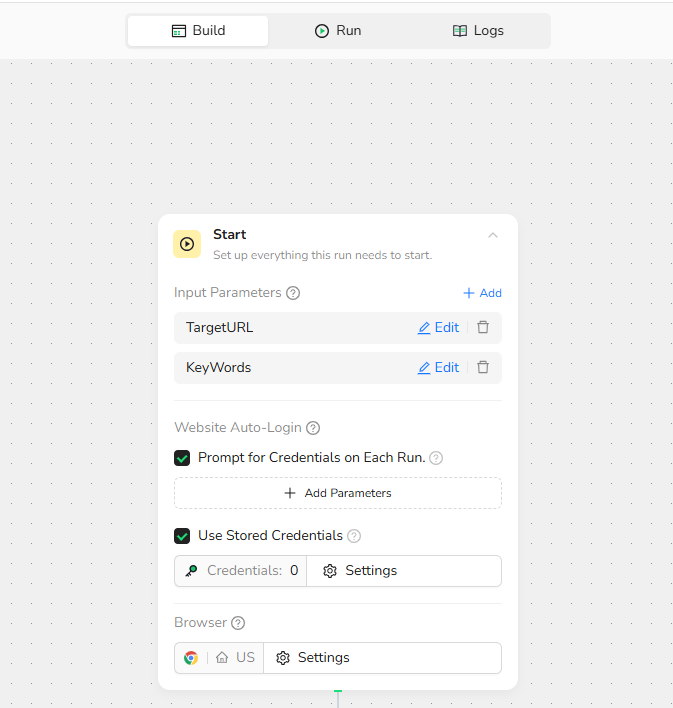
1.Start Node Parameter Settings
- Set up Video_URL parameter: the YouTube video URL to scrape comments from (e.g., "https://www.youtube.com)
- Set up Ketwords parameter: e.g., "BrowserAct"
- Set up commerts datelimit:e.g.,50"
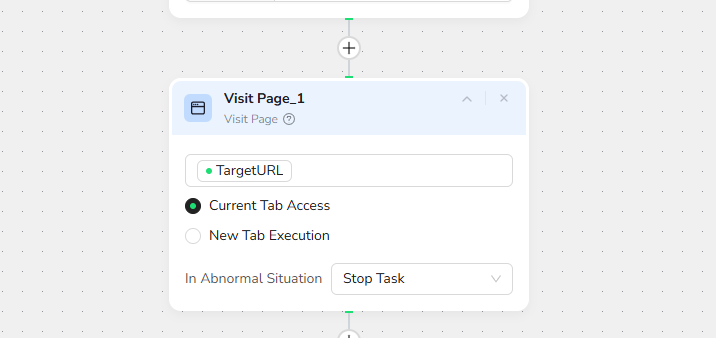
2.Visit Page
Navigate to the target YouTube video page using the target_url parameter
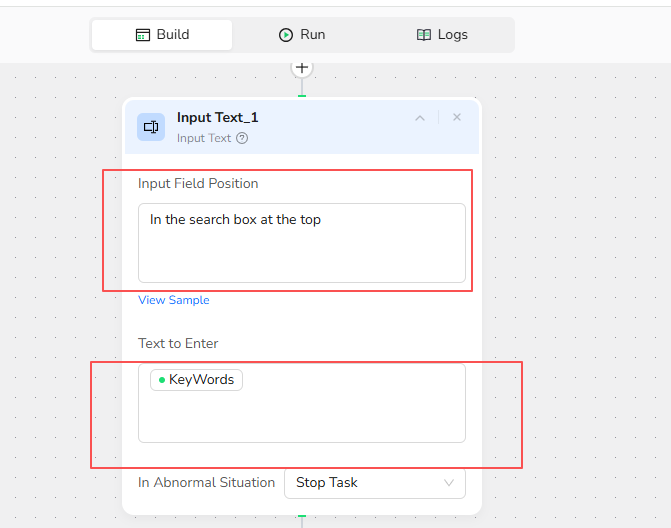
3.Input Text:
Input Field Position: In the search box at the top
Text to Enter:Use "/" to reference parameters for KeyWords parameters
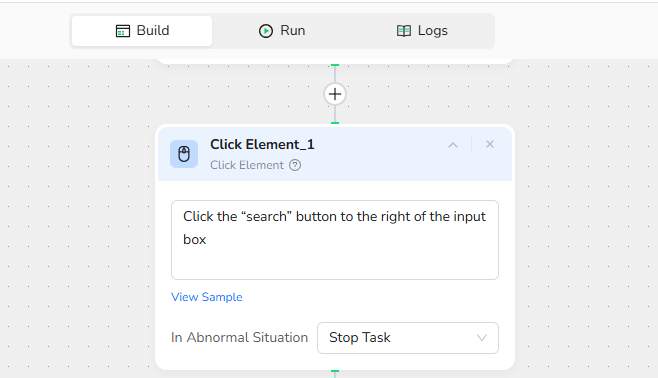
4.Click Element:
Click the “search” button to the right of the input box
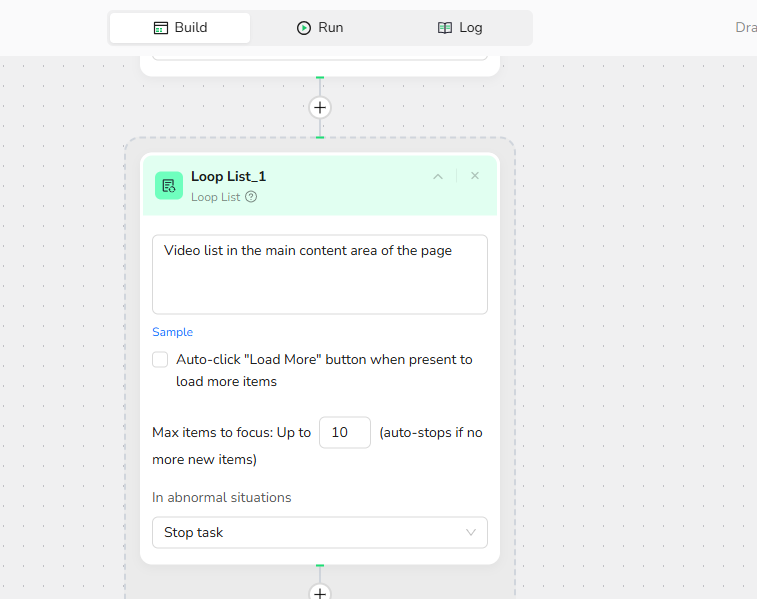
5.Add Loop List Node
Loop List Node Basic Settings:
- List Region Description: Video list in the main content area of the page
- Load More: Unchecked
- Max Focused Loop Items: (e.g.,12)
Note: The number of focused items = the number of videos you want to extract. Please adjust it according to your needs.
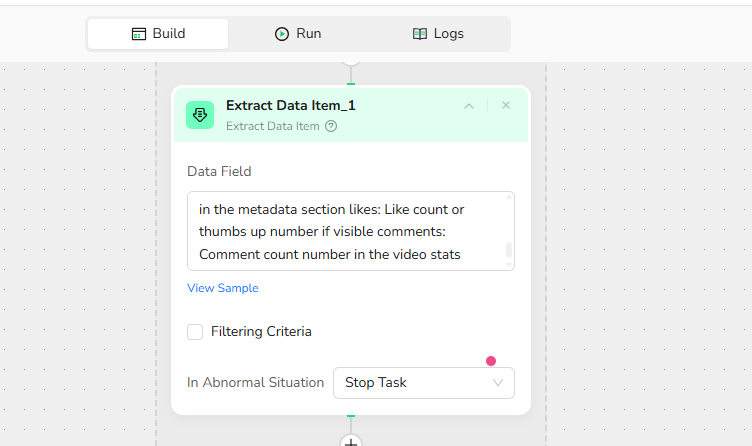
6.Add Extract Data Item
Data Fields: Extract the following fields from each comment item:title,ceator,publish_date,thumbnail,url ,views,likes,comments
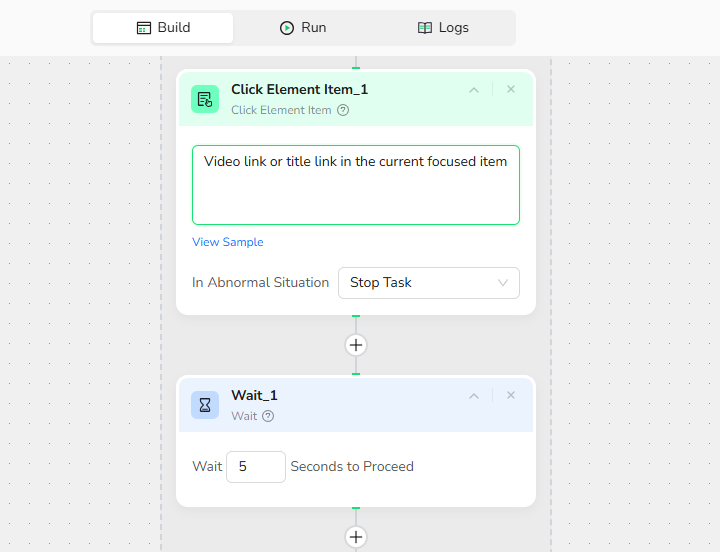
7.Add Click Element
- Target Element: Video link or title link in the current focused item
8.Add Wait:
Wait 5 seconds to proceed to the next step
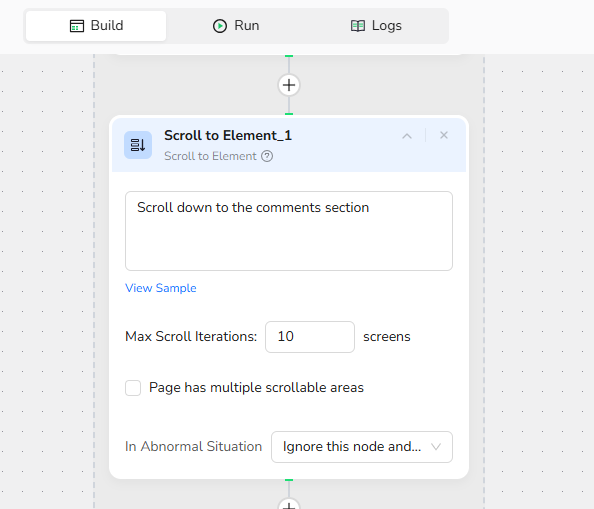
9.Add Scroll to Element
Scroll down to the comments section
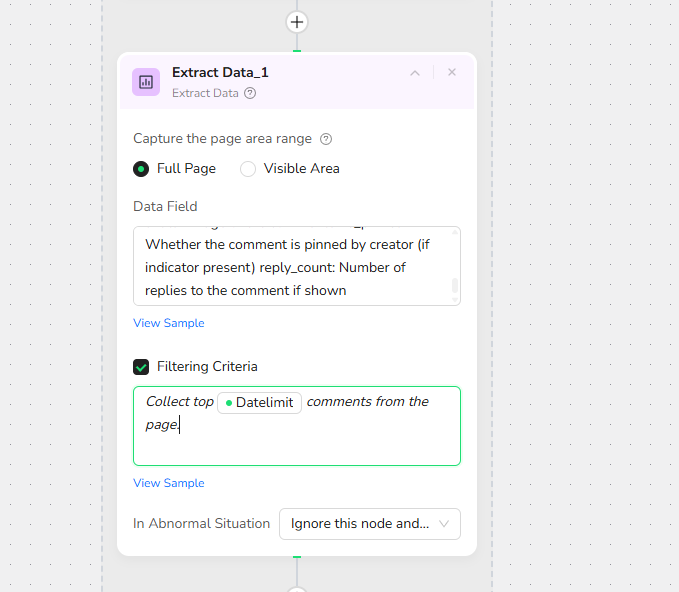
10.Add Extract Data
Data Fields:
extract following data:comment_text: Comment content or message text in each comment item commenter: Username or channel name of the comment author comment_date: Comment publish date or time ago (e.g., "2 days ago") comment_likes: Like count or thumbs up number on the comment commenter_avatar: Profile picture or avatar image of the commenter is_pinned: Whether the comment is pinned by creator (if indicator present) reply_count: Number of replies to the comment if shown
Filtering criteria:
Collect top /Datelimit comments from the page.
10.Output Data
Choose from multiple format options to suit your needs:
- JSON - Perfect for sentiment analysis tools, API integrations, and nested reply structures
- CSV - Ideal for Excel, Google Sheets, text analysis, and database imports
- XML - Great for enterprise content management systems and legacy integrations
- Markdown (MD) - Easy-to-read format for reports and human review
Key Rules & Best Practices
- Input Text only works with elements visible in the current viewport—scroll to the target area first if needed
- Each Input Text node handles one input field per execution—add multiple nodes for multiple fields
- Use clear, natural language to describe the input field's location (the AI handles element detection)
- For dynamic content, use "/" to reference parameters from earlier steps or external data sources
- The node automatically clears existing text before typing new content
FAQ Highlights
Q: What happens if the input field isn't found?
A: First, verify your input box description matches the actual page layout. Make sure the element is visible (not hidden or off-screen). If issues persist, try scrolling to the element first or using more specific location details.
Q: Can I input different text for each loop iteration?
A: Yes, use "/" to reference parameters that change with each loop cycle. For example, reference a product name column from your input data.
Q: Can I input text into multiple fields at once?
A: No. Each Input Text node fills one field per execution. Add separate Input Text nodes in sequence for multiple fields.
Quick Review
- What's the main purpose of Input Text node?
- Can you use this node on elements outside the visible area?
- How would you fill both an email field and a password field in a login form?
Need help?
- Check our documentation for more automation tips
- Join our Discord community for live support
- Email us at support@browseract.com

Relative Resources


Latest Resources

BrowserAct vs Skyvern: Open-Source Browser Agent vs Managed Workflow

BrowserAct vs Selenium in 2026: Is It Time to Move On?

BrowserAct CAPTCHA Handling vs 2Captcha vs CapSolver: Real Cost Comparison
