How to Share BrowserAct Workflows?

This complete guide covers BrowserAct workflow sharing: saving templates, setting permissions, and generating share links. Perfect for team collaboration.
BrowserAct's template sharing feature makes it easy to share your workflows with others. Simply save your workflow as a template, generate a share link, and recipients can use it instantly with one click.
What Can You Do with Workflow Sharing?
With BrowserAct's template sharing feature, you can:
- ✅ Quickly share your workflows with friends, colleagues, or community members
- ✅ Recipients can use the workflow instantly with one click—no complex setup required
- ✅ Flexibly manage access permissions and reset share links anytime
- ✅ Enable rapid workflow duplication and team collaboration
When Should You Use Workflow Sharing?
1.Deliver Custom Workflows to Clients
Share workflow template links with clients so they can create and run workflows instantly, enabling fast delivery.
2.Share Best Practices with the Community
Contribute your expertise by sharing templates with the community and discussing optimization strategies with other users.
3.Streamline Team Collaboration
Share workflow templates within your team to reduce redundant setup time and boost overall productivity.
How to Share a Workflow (Step-by-Step Guide)
Before you share: You need to save your workflow as a template first.
Step 1: Save Your Workflow as a Template
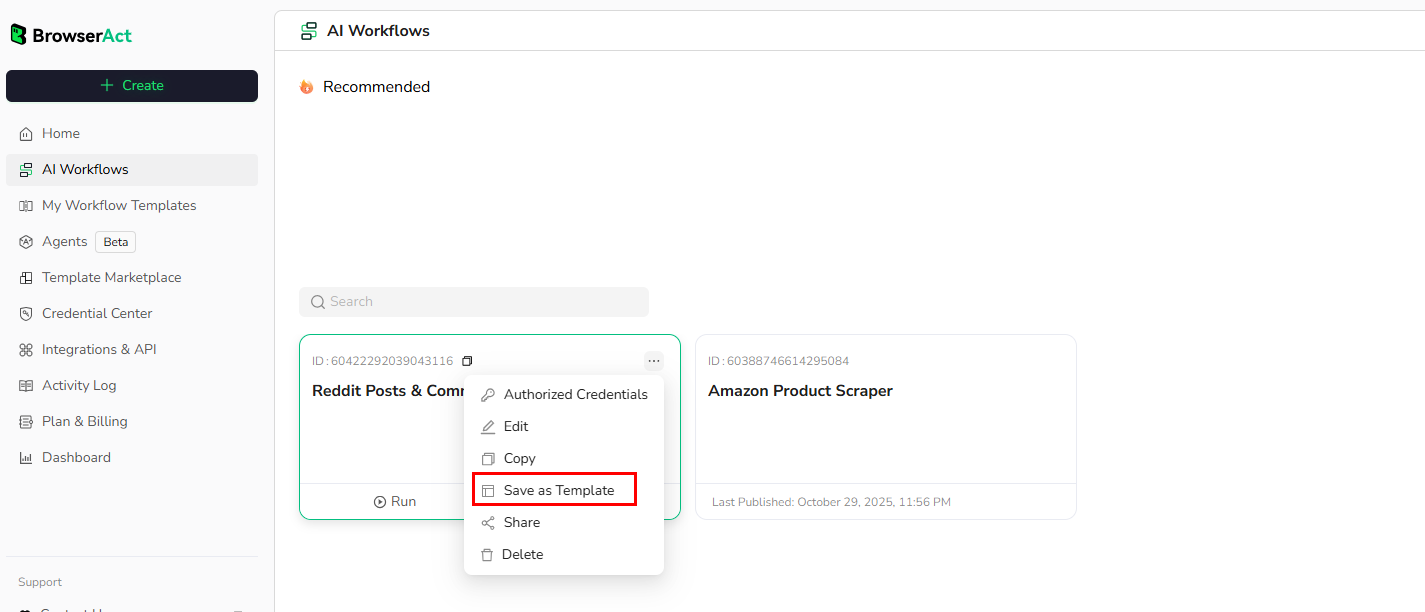
Option 1: From the Workflow List
- In the workflow list, select the workflow you want to share
- Click the "..." button in the top right corner
- Select "Save as template" from the dropdown menu
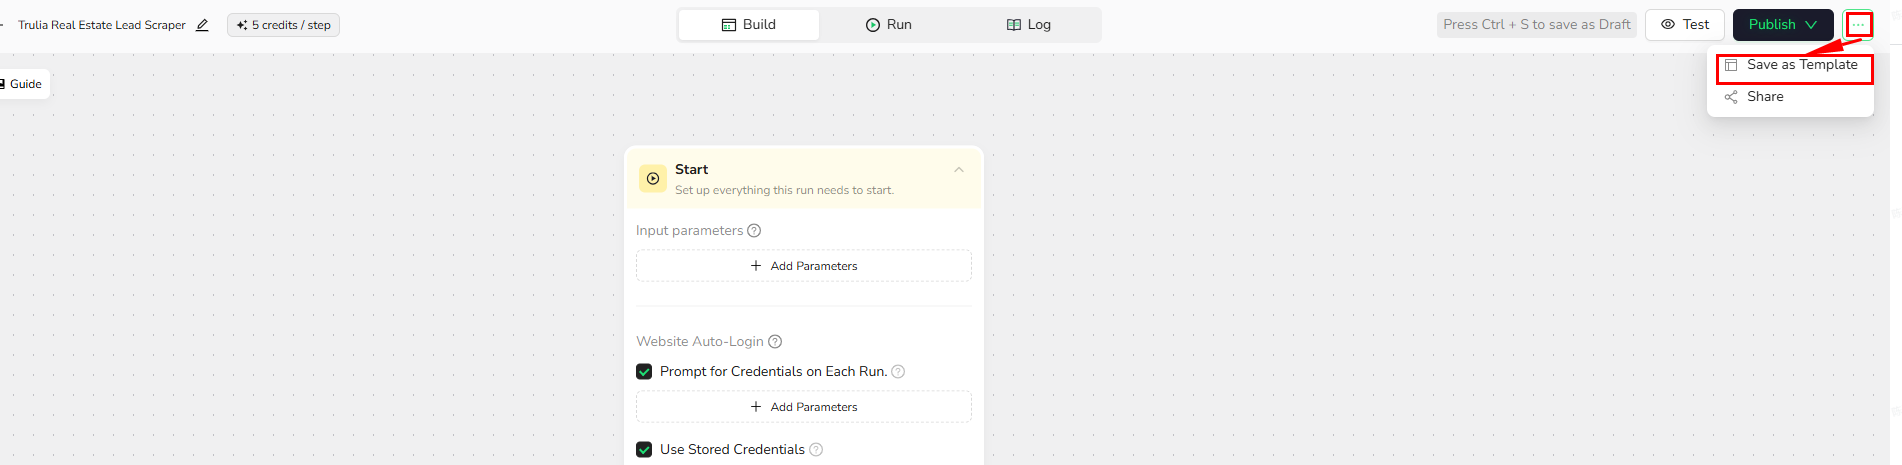
Option 2: From the Workflow Build Page
- While editing your workflow, click the "..." button in the top right corner
- Select "Save as template" from the dropdown menu
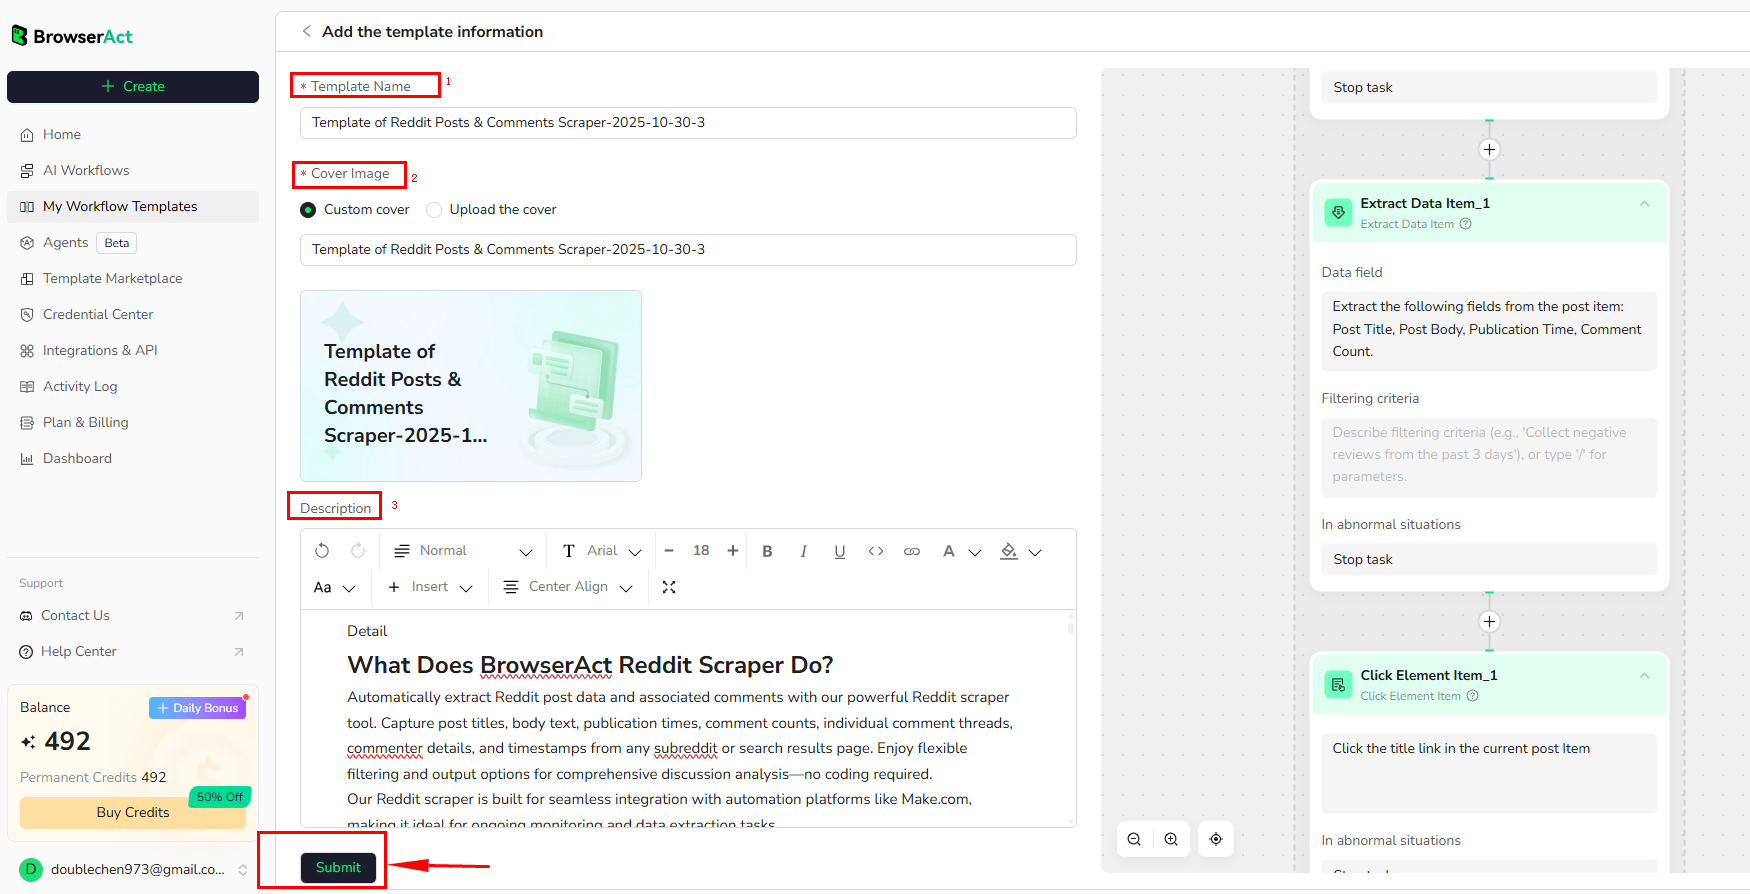
Step 2: Complete the Template Information
Fill out the following details to help users better understand and use your template:
Template Name
- Defaults to your workflow name
- Click to edit and customize
Cover Image
- Default option: Use system-designed cover
- Custom upload: Switch to "Upload the cover" to upload from your device
- Recommended size: 856×482px (16:9 ratio)
- Supported formats: PNG, JPG, JPEG, WebP
- Max file size: 10MB
Description
Provide a detailed description of your template's purpose and usage. We recommend including:
- Workflow functionality overview
- Applicable scenarios
- Step-by-step operation guide (what each parameter does and how to configure it)
- Common issues and troubleshooting tips
Step 3: Create and Configure the Share Link
1.Access the Sharing Settings Page
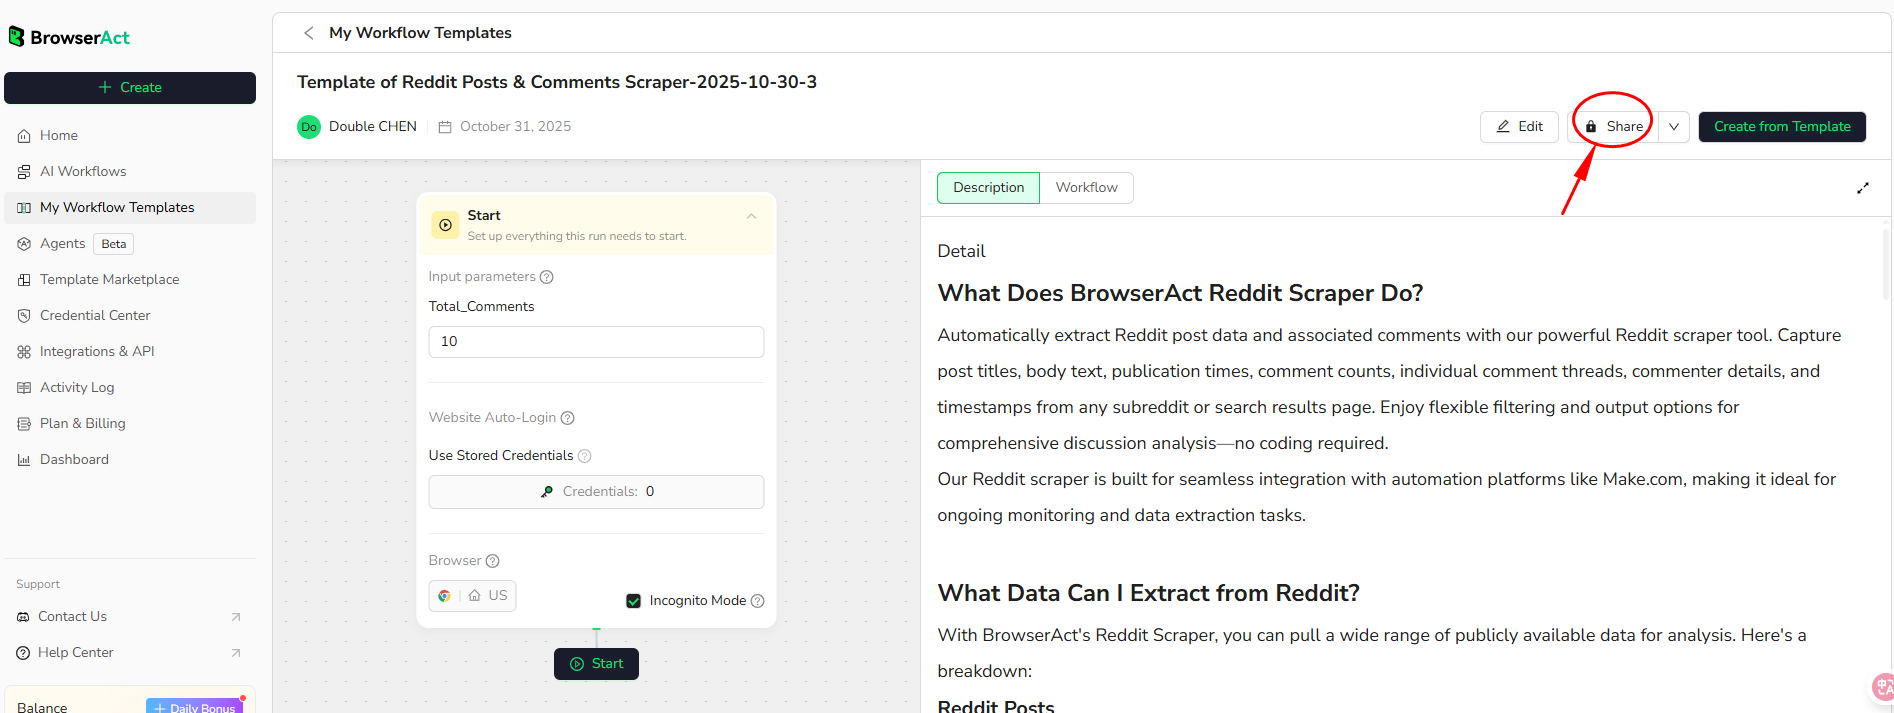
Option 1: From the Template Details Page
- Click the "Share" button in the top right corner to enter the configuration page
Option 2: From the Template Management Page
- Go to "My Workflow Templates"
- Select the target template
- Click the "..." button at the bottom right of the template card
- Select "Share"

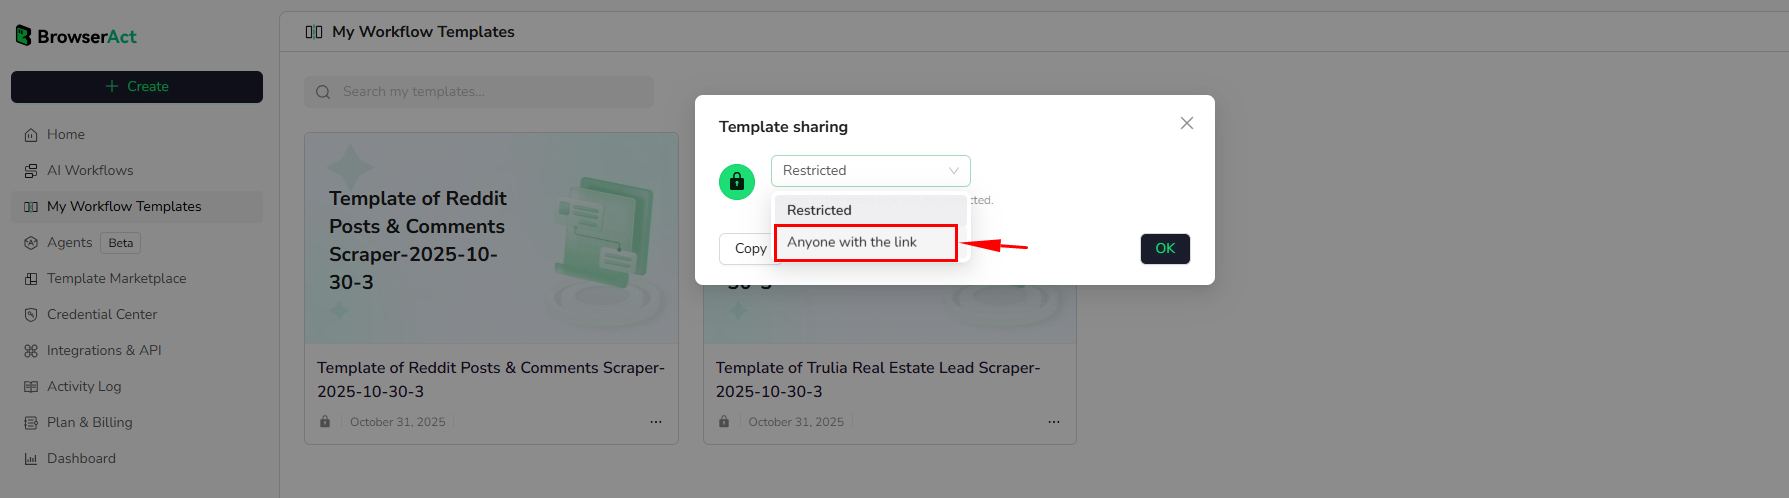
2.Configure Sharing Permissions
Set Link Access Scope
- Click the dropdown menu
- Select "Anyone with the link"
- After adjustment, you'll see: "Anyone on the internet with the link can run this workflow template."
Set User Permissions
- Only Run: Visitors can only run the workflow through the link
- Run and Use: Visitors can run the workflow AND create their own copy based on this template

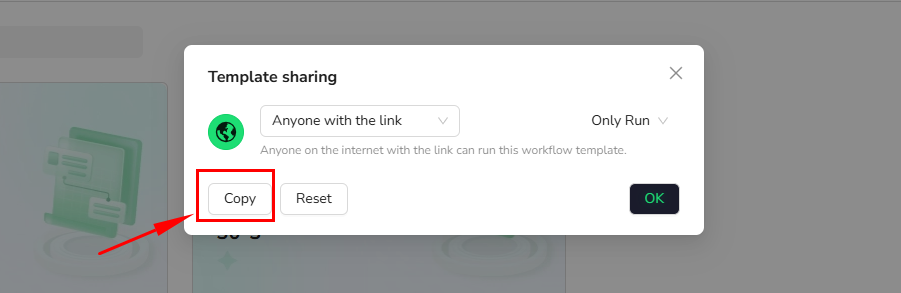
Step 4: Copy and Share the Template Link
Click "Copy" to copy the workflow template link, then share it with your target users. Recipients can quickly use the template by clicking the link.
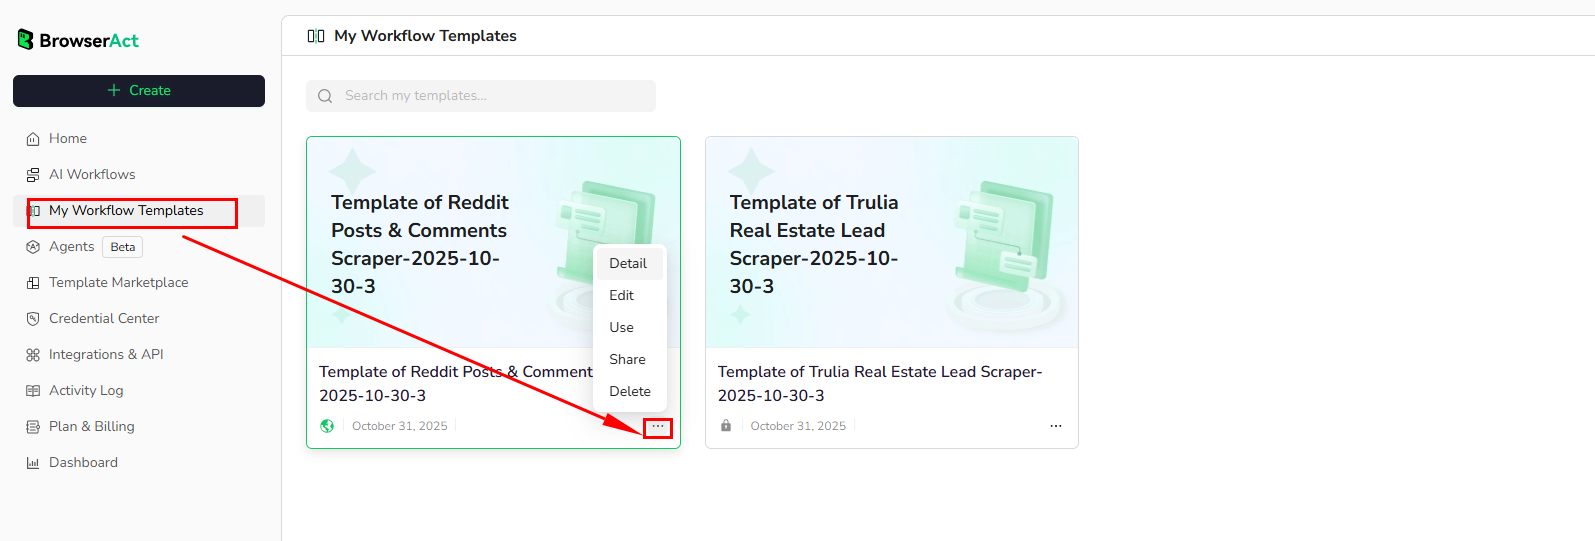
Managing Your Workflow Templates
Go to the "My Workflow Templates" page and click the "..." button below any template card to perform the following actions:
- Detail: View the template details page
- Edit: Edit template information
- Use: Open the template's workflow page
- Share: Access sharing settings to manage links and permissions
- Delete: Delete the template (cannot be recovered after deletion)
How to Update a Shared Workflow
When your workflow needs updates, follow these steps to sync the template:
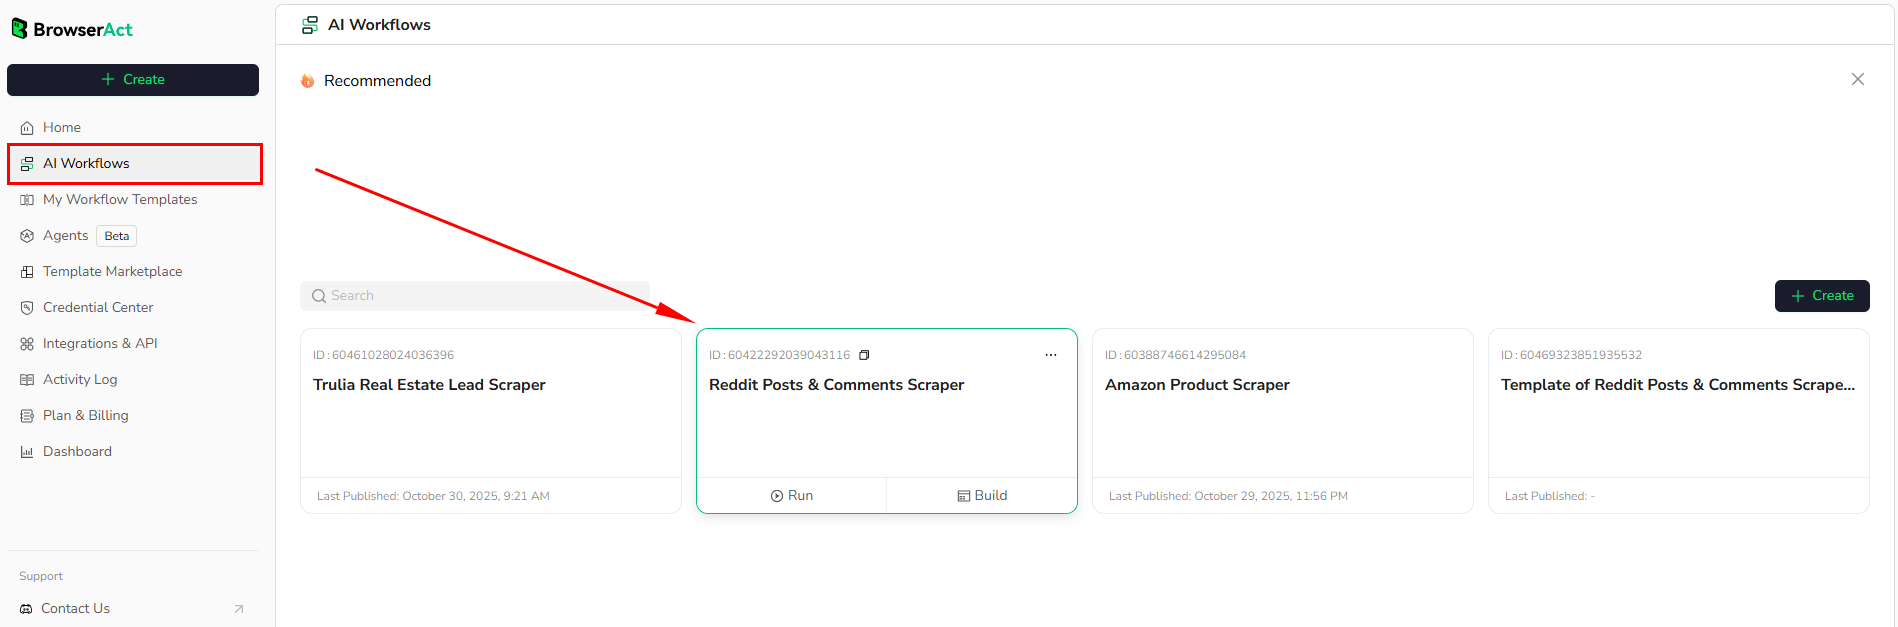
1.Edit the Workflow
- Go to the workflow list page
- Select and open the corresponding workflow
2.Save as Template
- After completing workflow edits, click "Save as template" in the top right corner

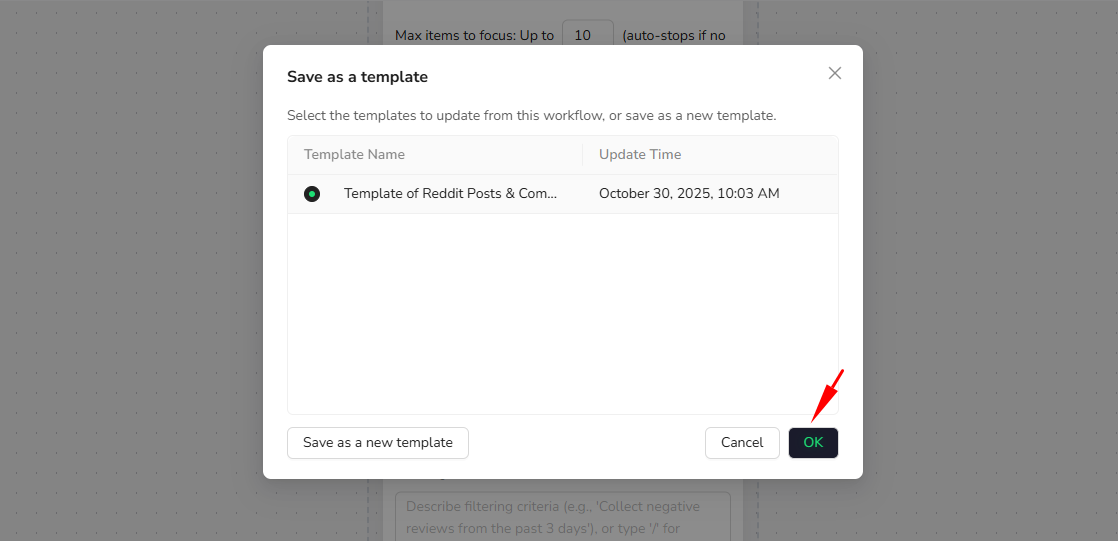
3.Select the Template to Update
- From the template list, select the template you want to update
- Click "Confirm" to complete the update
FAQ
1.Can I create multiple templates from the same workflow?
Yes. One workflow can be saved as multiple different templates, suitable for different sharing scenarios.
2.After resetting a shared link, can the original link still be accessed?
No. Once the link is reset, the original link becomes invalid immediately and can no longer access the template.
3.Can one template link be shared with multiple people?
Yes. Anyone with the link can access and use the template (depending on the permissions you've set).
4.What happens to share links after deleting a template?
After deleting a template, all related share links will become invalid, and the template cannot be recovered.
5.How do I revoke a shared link?
Go to the sharing settings page and click "Reset" to invalidate the original link. The system will generate a new share link.
Need Help?
If you have questions or run into any issues while sharing workflows, feel free to reach out:
- Discord: [Discord Community]
- Email: service@browseract.com

Relative Resources


Latest Resources

BrowserAct vs Skyvern: Open-Source Browser Agent vs Managed Workflow

BrowserAct vs Selenium in 2026: Is It Time to Move On?

BrowserAct CAPTCHA Handling vs 2Captcha vs CapSolver: Real Cost Comparison
