BrowserAct Wait Node—Beginner's Guide

Master BrowserAct's Wait node handles dynamic content loading and timing-sensitive operations. Add strategic pauses in your workflows to ensure pages fully load before extracting data or clicking elements. Learn features, setup rules, and real-world examples to eliminate automation errors caused by timing issues.
What is the Wait Node?
The Wait node is a timing control tool that pauses your workflow for a specified duration before proceeding to the next step. It ensures pages have enough time to load dynamic content, animations to complete, or asynchronous operations to finish before your automation continues.
When Should You Use It?
Use the Wait node if you need to:
- Allow time for dynamic content to load after clicking "Load More" buttons on infinite scroll pages
- Wait for page elements to appear after navigation or form submissions
- Give JavaScript-heavy websites time to render content before extracting data
- Ensure animations or transitions complete before interacting with newly visible elements
- Synchronize your workflow with slow-loading pages or network delays
How to Set Up Wait (Step by Step)
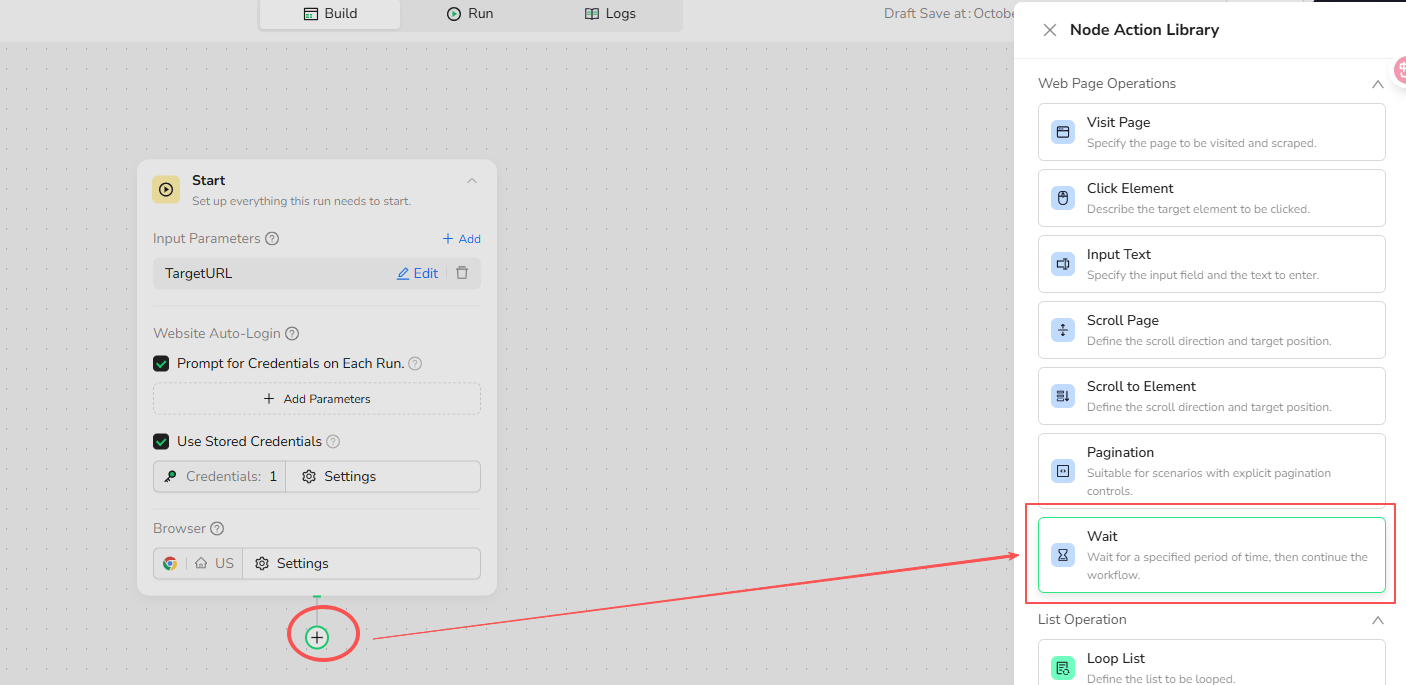
1.Add Wait Node
In your workflow, click the + button and select "Wait" from the node options.
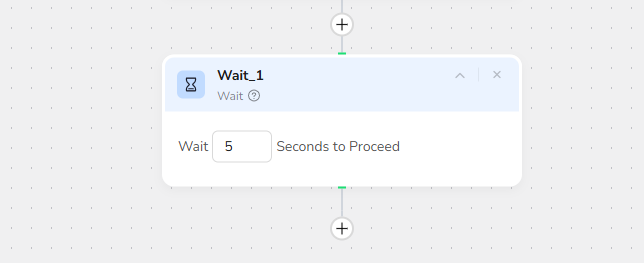
2.Configure Wait Duration
Wait Time: Enter the number of seconds to pause (default is 5 seconds).
Example durations:
- 3 seconds - For fast-loading content updates
- 5 seconds - Standard wait for most dynamic pages
- 10 seconds - For heavy JavaScript applications or slow network connections
The node will pause the workflow execution for your specified duration before moving to the next step.
3.Position the Wait Node Strategically
Place Wait nodes at critical points in your workflow:
- After Click Element - Wait for the page to respond to button clicks
- Before Extract Data - Ensure content is fully loaded before extraction
- After Visit Page - Give new pages time to render completely
4.Run Your Workflow
When the workflow reaches the Wait node, it pauses for the specified time, then automatically continues to the next step once the wait period completes.
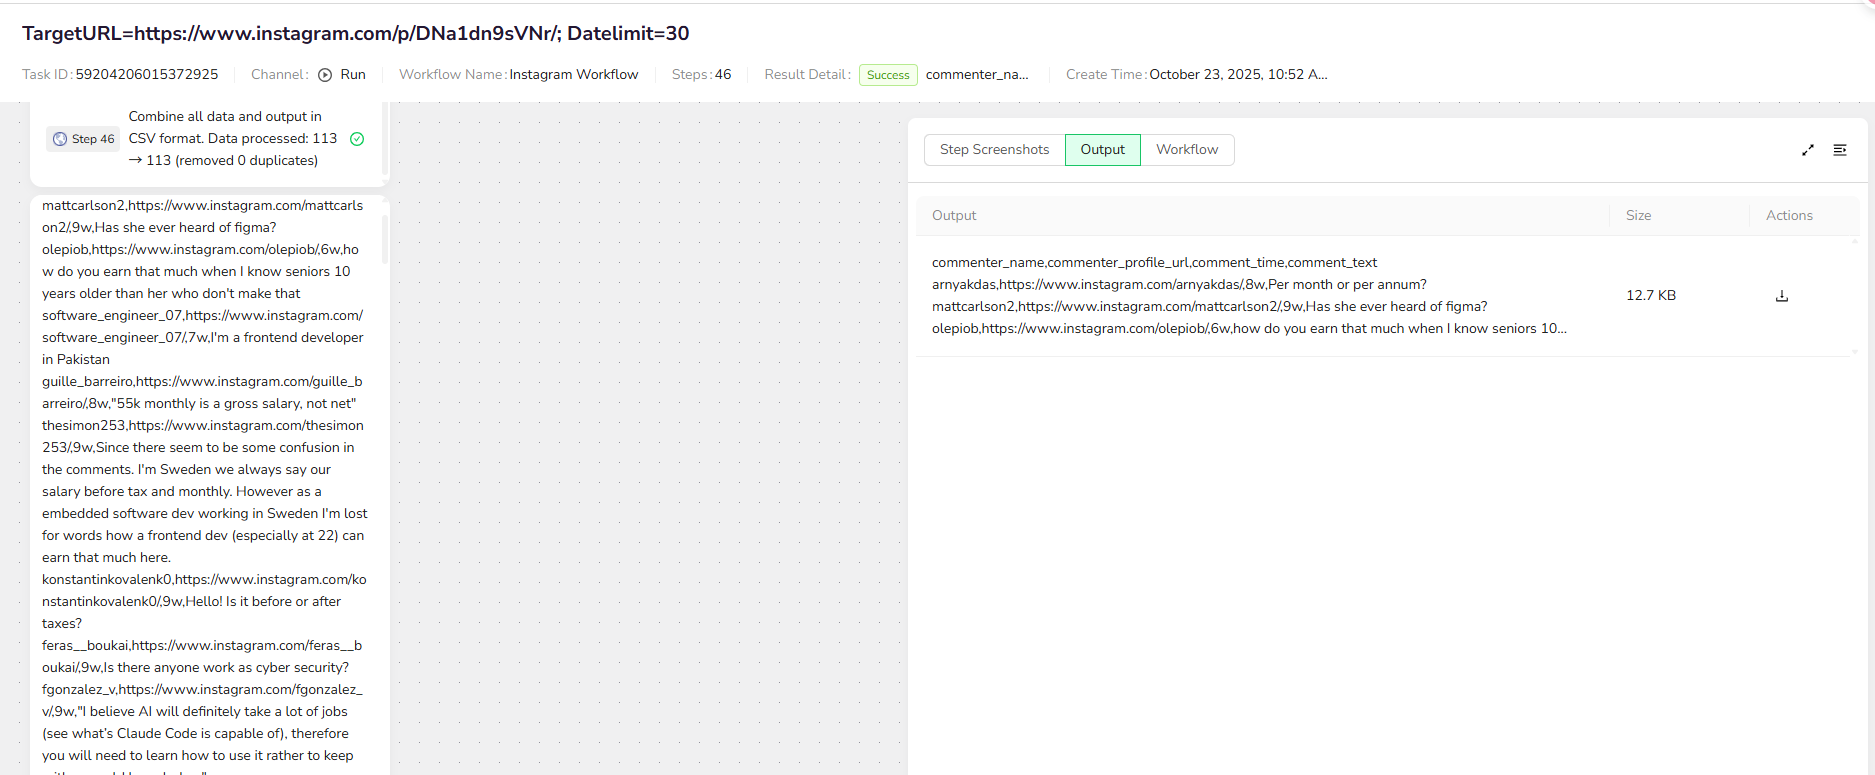
Example: Instagram Comment Scraper
This tutorial will guide you through creating an automated workflow to batch extract comment data from Instagram posts.
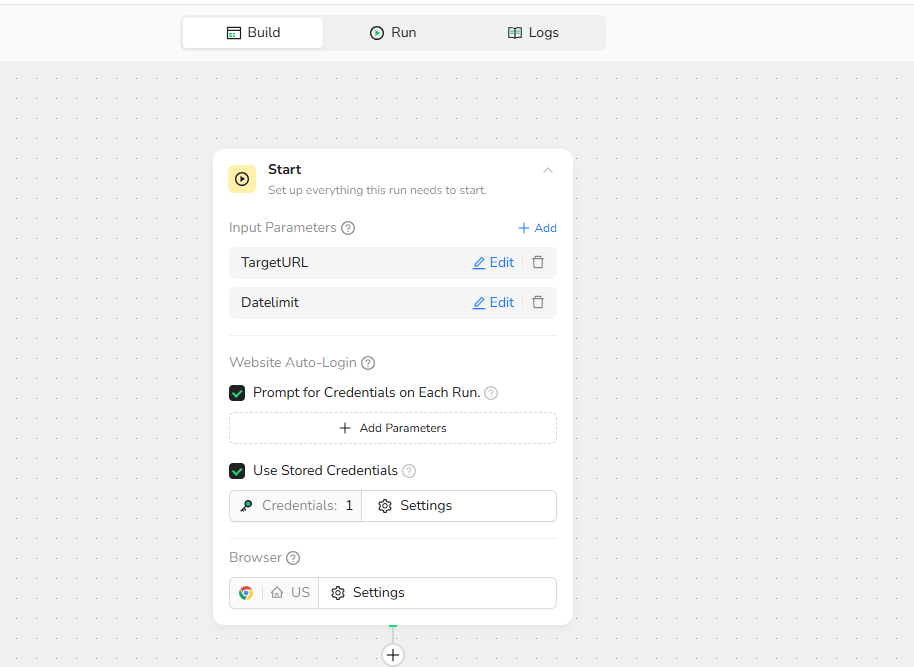
1.Start Node Parameter Settings
TargetUrl
- Enter the Instagram post link you want to scrape
- Example:
https://www.instagram.com/p/DNa1dn9sVNr/
DateLimit
Set the number of comments to extract
Example: 50 (adjustable based on your needs)
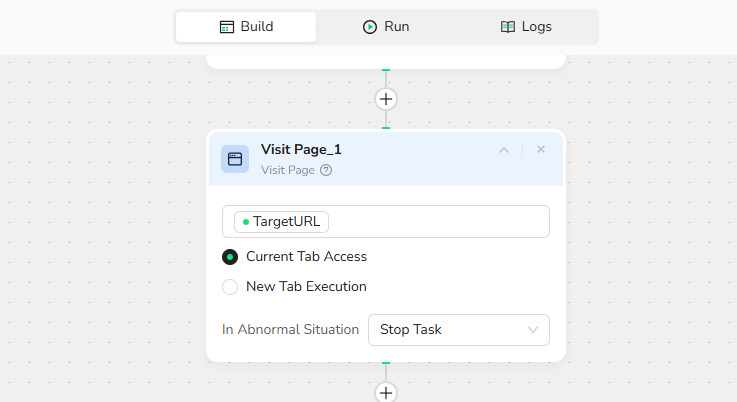
2.Add Visit Page Node
Enter "/" to reference the URL parameter
Select Open in the current page
3.Add Loop Node
Loop Stop Condition:
- Scroll to the bottom of the comments section OR
- The
/DateLimitspecified number of comments has been collected
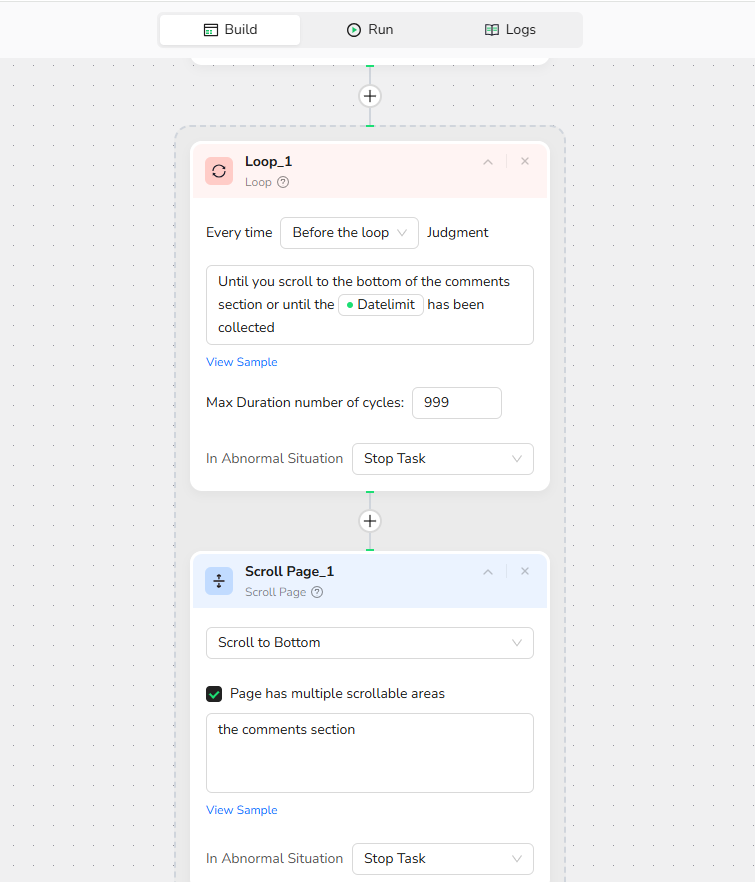
4.Add Scroll Page node
Configuration:
- ✅ Select Scroll to bottom
- ✅ Check Page has multiple scrollable areas
- Area description:
the comments section
5.Add Extract Data Node
Extract the following fields:
- commenter_name (the display name / username shown next to the comment)
- commenter_profile_url (absolute link to the commenter’s profile)
- comment_time (ISO-8601 if available, otherwise the exact text as shown)
- comment_text (the full textual content of the comment, excluding emojis-only reactions if possible)
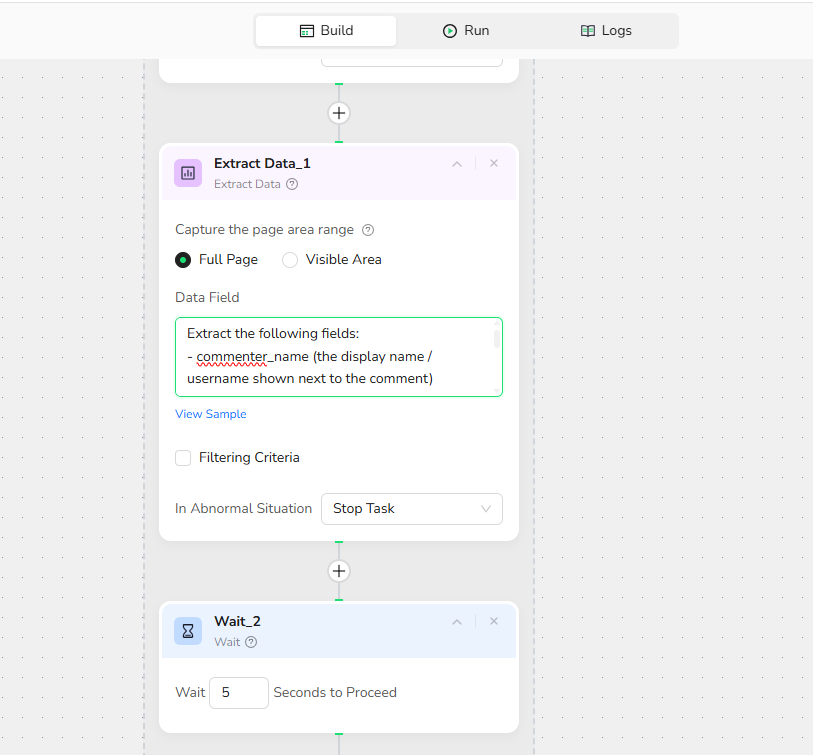
6.Add Wait Node
Wait Time: 5 seconds
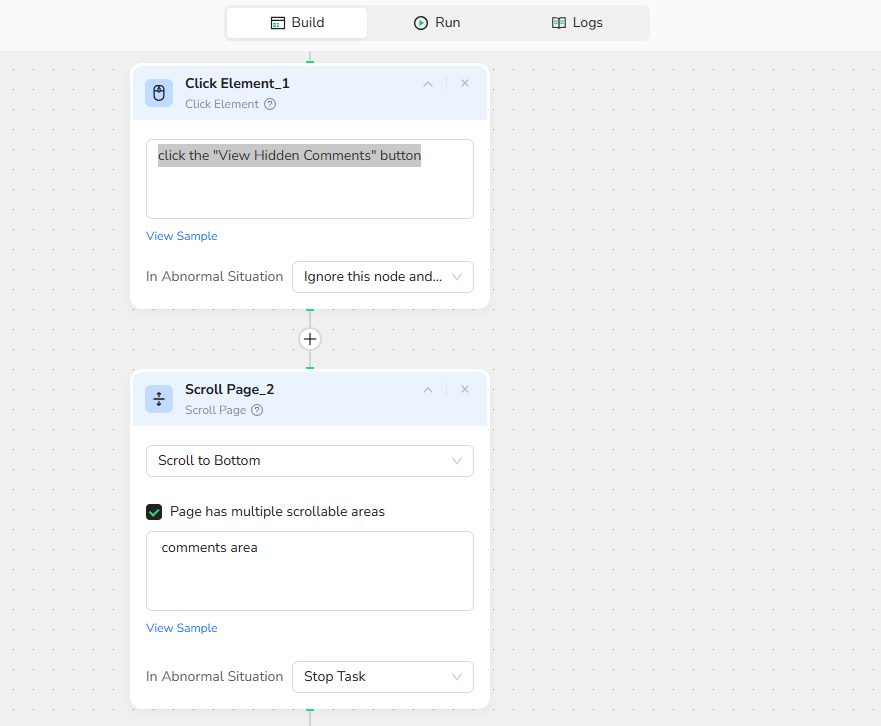
7.Add Click Elemen
click the "View Hidden Comments" button
8.Add Scroll Page node
Configuration:
- ✅ Select Scroll to bottom
- ✅ Check Page has multiple scrollable areas
- Area description:
the comments section
9.Add Extract Data Node
Extract the following fields:
- commenter_name (the display name / username shown next to the comment)
- commenter_profile_url (absolute link to the commenter’s profile)
- comment_time (ISO-8601 if available, otherwise the exact text as shown)
- comment_text (the full textual content of the comment, excluding emojis-only reactions if possible)
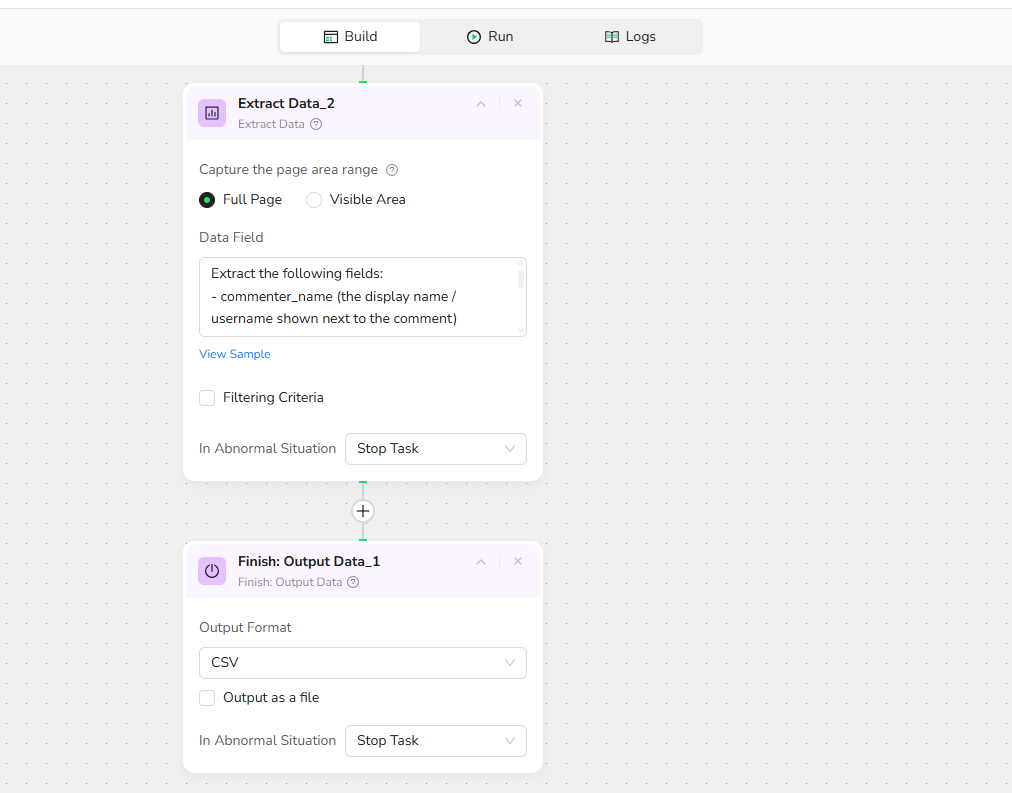
10.Output Data
Select CSV file format for output.
Key Rules & Best Practices
- Each Wait node executes one single pause—add multiple Wait nodes for complex timing sequences
- Use the minimum necessary wait time to keep workflows efficient without unnecessary delays
- Position Wait nodes immediately after actions that trigger content changes
- For highly variable loading times, test your workflow with different wait durations to find the optimal setting
- Avoid using Wait as a substitute for proper element detection—use it only when timing is genuinely needed
Quick Tips
- Always test your workflow multiple times to identify the minimum effective wait time
- Place Wait nodes after Click Element nodes that trigger page changes or content updates
- For infinite scroll pages, add Wait inside Loop Execution nodes to pace content loading
- Monitor your workflow execution to spot unnecessary waits that can be removed or shortened
- Combine Wait with Extract Data to ensure you're capturing complete, fully-loaded content
Quick Review
- What's the main purpose of the Wait node?
- Where should you position wait nodes in your workflow?
- How would you handle a page that loads content in multiple stages?
Need help?
· Check our documentation for more automation tips
· Join our Discord community for live support
· Email us at support@browseract.com

Relative Resources


Latest Resources

BrowserAct vs Skyvern: Open-Source Browser Agent vs Managed Workflow

BrowserAct vs Selenium in 2026: Is It Time to Move On?

BrowserAct CAPTCHA Handling vs 2Captcha vs CapSolver: Real Cost Comparison
