How to Set Up LinkedIn Two-Factor Authentication in BrowserAct

Secure your LinkedIn automation by enabling two-factor authentication (2FA) with BrowserAct. This guide walks you through the complete setup process.
Prerequisites
- An active LinkedIn account
- BrowserAct installed and ready to use
- An authenticator app (recommended: Google Authenticator, Authy, or Microsoft Authenticator)
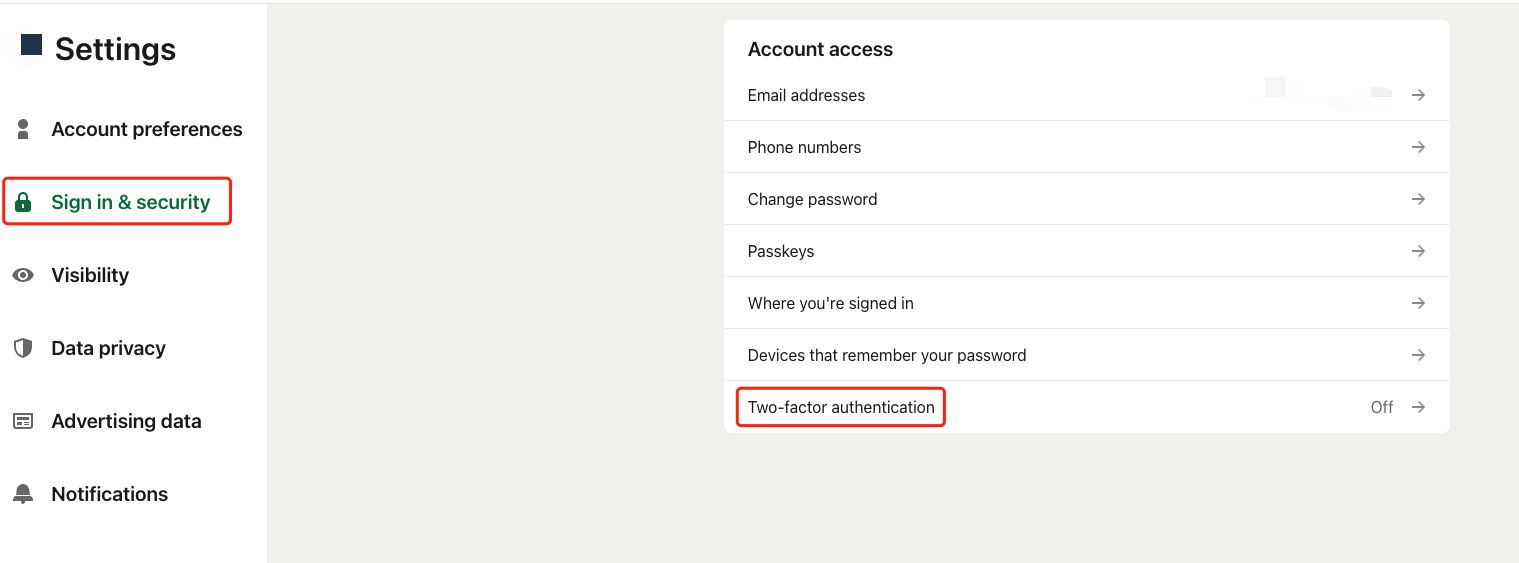
Step 1: Enable Two-Factor Authentication on LinkedIn
- Navigate to your LinkedIn Security Settings
- Locate Two-factor authentication in the Account access section
- Click to enable the feature
Note: Enabling 2FA will sign you out of all devices where you're currently logged in. You'll need to re-authenticate with your saved credentials.
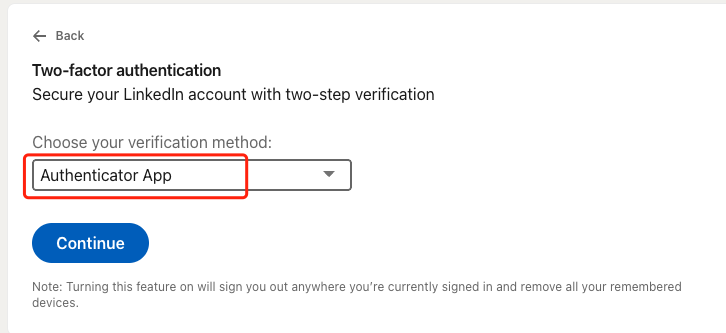
Step 2: Select Authenticator App as Your Verification Method
- When prompted to choose your verification method, select Authenticator App from the dropdown menu
- Click Continue
LinkedIn will generate a QR code and a secret key for your authenticator app.
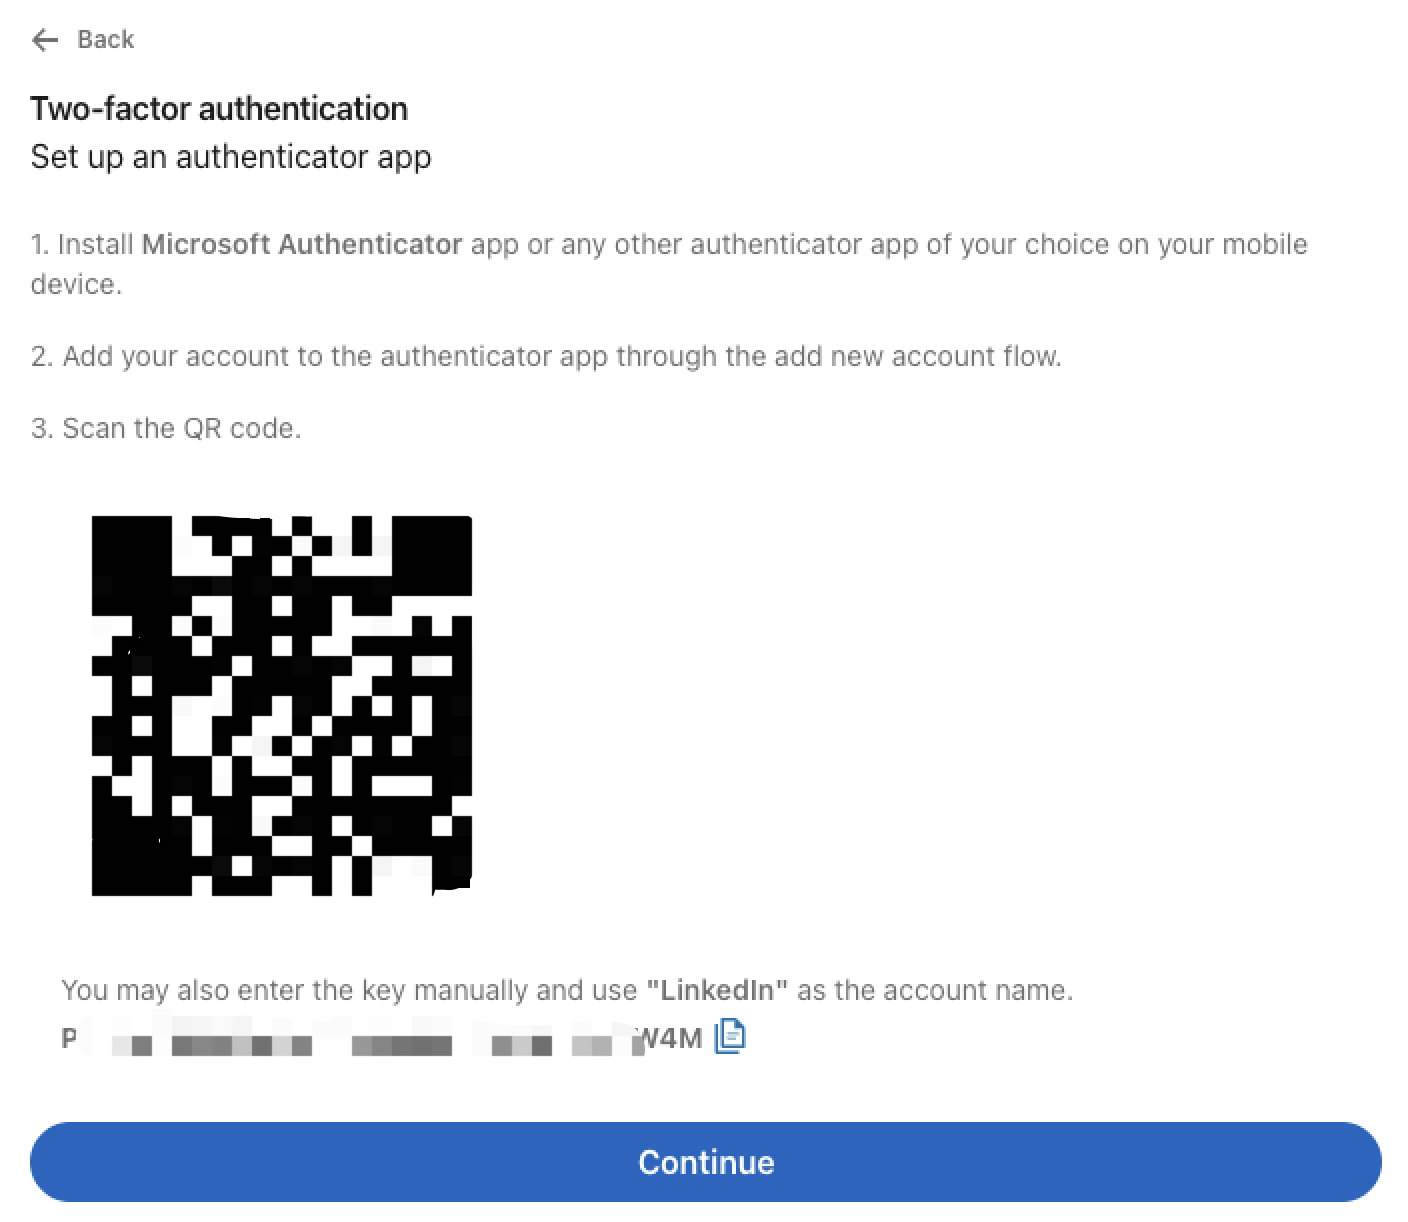
Step 3: Copy Your Authenticator Key
- On the 2FA setup screen, you'll see both a QR code and a text key
- Copy the authenticator key (the alphanumeric string shown below the QR code)
- You can also manually enter this key into your authenticator app using "LinkedIn" as the account name
Important: Keep this key secure. You'll need it to configure BrowserAct.
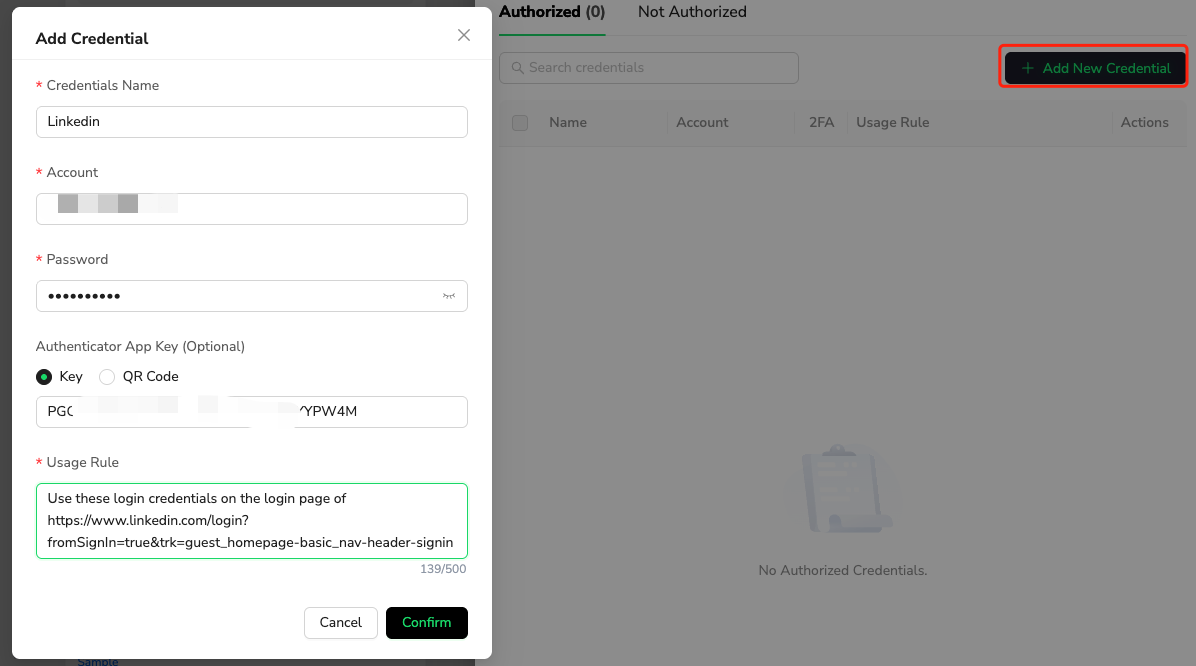
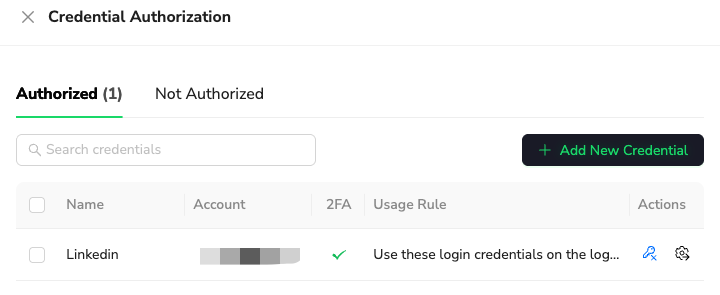
Step 4: Add Credentials to BrowserAct
- Open BrowserAct and navigate to Credential Authorization
- Click + Add New Credential
- Fill in the credential details:
- Credentials Name: LinkedIn
- Account: Your LinkedIn username/email
- Password: Your LinkedIn password
- Authenticator App Key: Paste the key you copied from LinkedIn
- In the Usage Rule field, enter:
Use these login credentials on the login page of https://www.linkedin.com/login?fromSignIn=true&trk=guest_homepage-basic_nav-header-signin
- Click Confirm to save
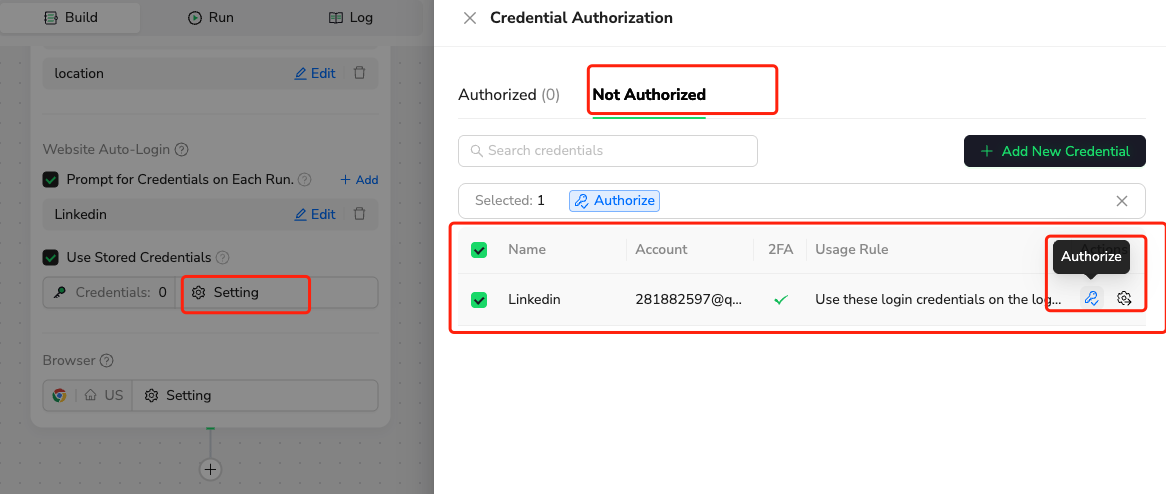
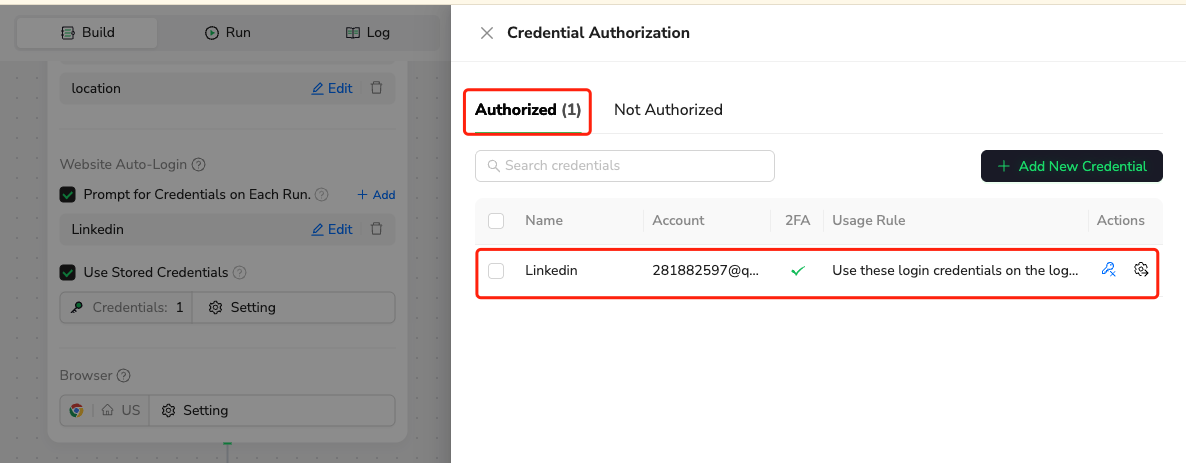
Step 5: Authorize Your Credentials
- In the Credential Authorization window, switch to the Not Authorized tab
- Select your newly added LinkedIn credential
- Click Authorize
- The credential will move to the Authorized tab once successfully verified
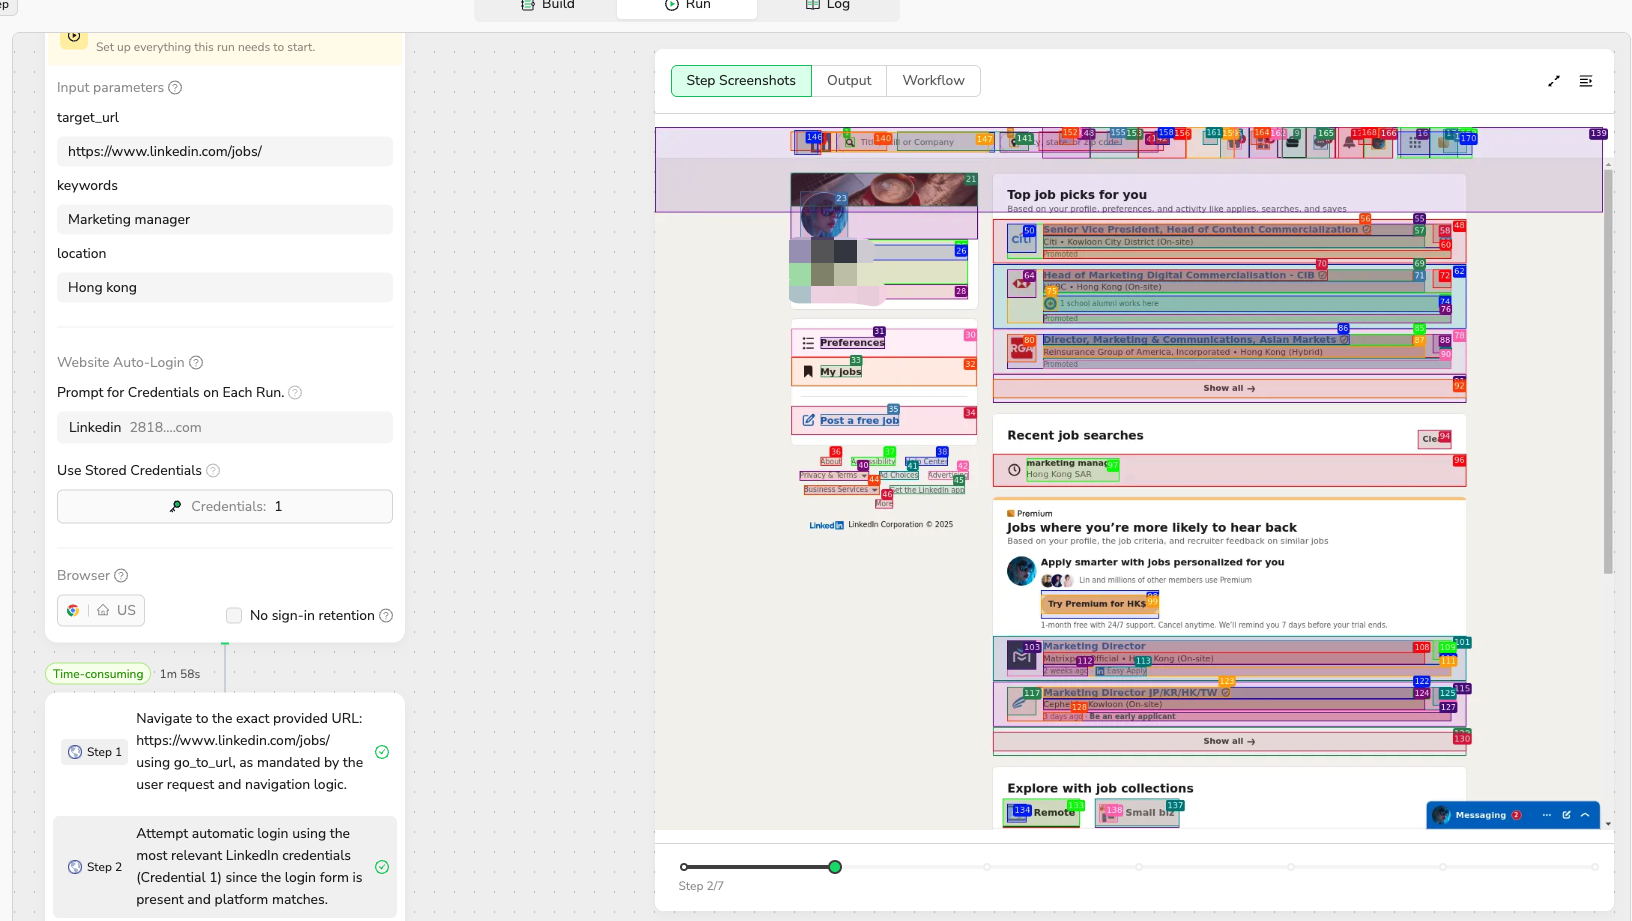
Step 6: Run Your LinkedIn Automation
Your LinkedIn account is now secured with 2FA and ready to use with BrowserAct. The platform will automatically handle authentication using your stored credentials.
Pro tip: Enable "Prompt for Credentials on Each Run" if you want additional control over when credentials are used.
Troubleshooting
- Credential not working? Double-check that you copied the complete authenticator key without extra spaces
- Still having issues? Visit LinkedIn's 2FA Help Center for additional support
Need help? Contact BrowserAct support or consult our documentation for more automation tips.
- Discord: [Discord Community]
- E-mail: service@browseract.com

Relative Resources

Unlock Powerful Automation with BrowserAct Integrations

BrowserAct Integration with Make: Complete Setup Guide

2025 Best AI Assistant Tools: Our In-Depth Review

BrowserAct Integration Guide for n8n
Latest Resources

BrowserAct vs Skyvern: Open-Source Browser Agent vs Managed Workflow

BrowserAct vs Selenium in 2026: Is It Time to Move On?

BrowserAct CAPTCHA Handling vs 2Captcha vs CapSolver: Real Cost Comparison
