BrowserAct Integration Guide for n8n

Learn how to integrate BrowserAct with n8n for automated web scraping. Step-by-step guide covering installation, API setup, workflow configuration, and best practices for data extraction.
This guide provides step-by-step instructions for integrating BrowserAct with n8n to create automated web scraping workflows. BrowserAct enables powerful browser automation and data extraction capabilities within your n8n workflows.
Prerequisites
- Active n8n account
- Active BrowserAct account
- Basic familiarity with n8n workflow creation
Installation and Setup
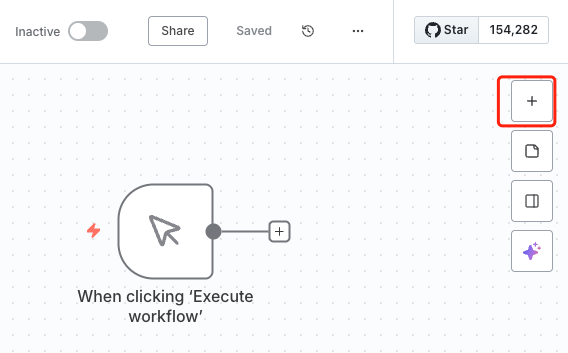
Step 1: Access n8n Workflow Canvas
Log in to your n8n account and navigate to the workflow editor. Click the "+" button on the canvas to create a new node.
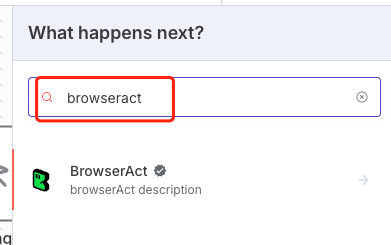
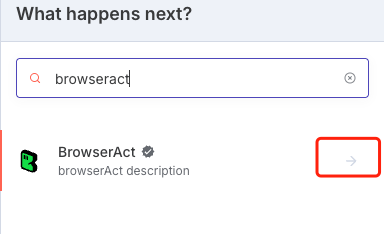
Step 2: Locate BrowserAct Node
In the node search box, type "BrowserAct" to find the BrowserAct integration.
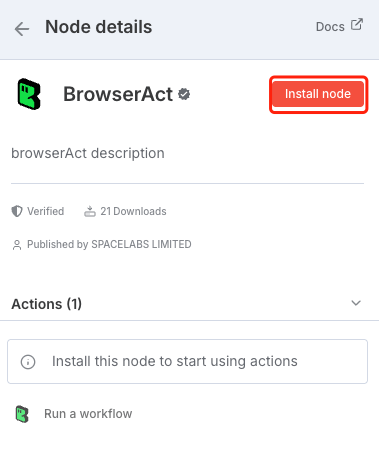
Step 3: Install BrowserAct Node
Click on the BrowserAct node from the search results to install it. The installation process will add the node to your available integrations library.
Step 4: Add BrowserAct Node to Workflow
Once installation is complete, you can add the BrowserAct node to your workflow canvas. Currently, the available action is "Run a Workflow", which allows you to execute pre-configured BrowserAct workflows.

Configuration
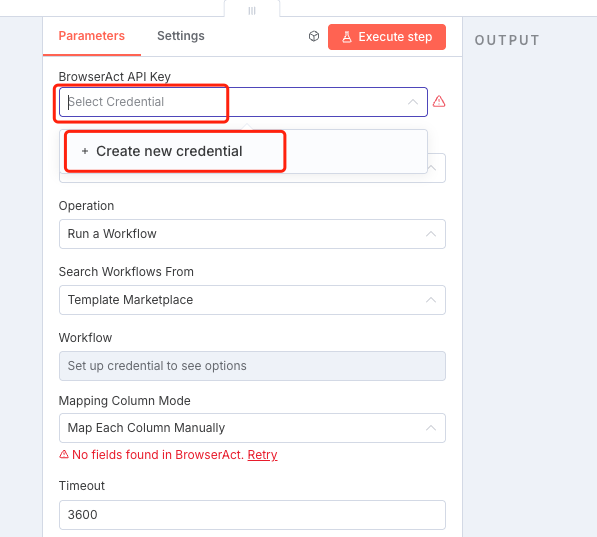
Step 5: Configure Authentication
To connect BrowserAct with n8n, you'll need to authenticate using your API Key:
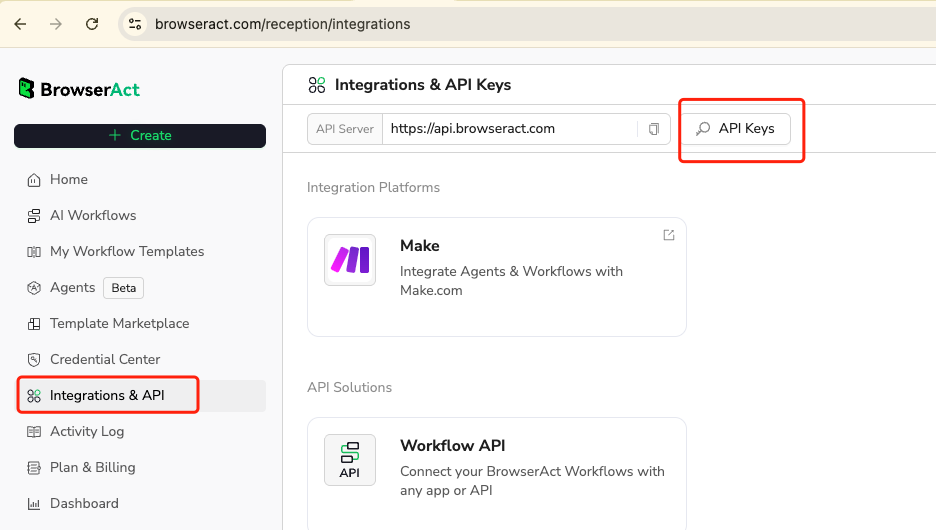
Obtaining Your BrowserAct API Key:
- Log in to your BrowserAct account
- Navigate to Integration & API → API Keys
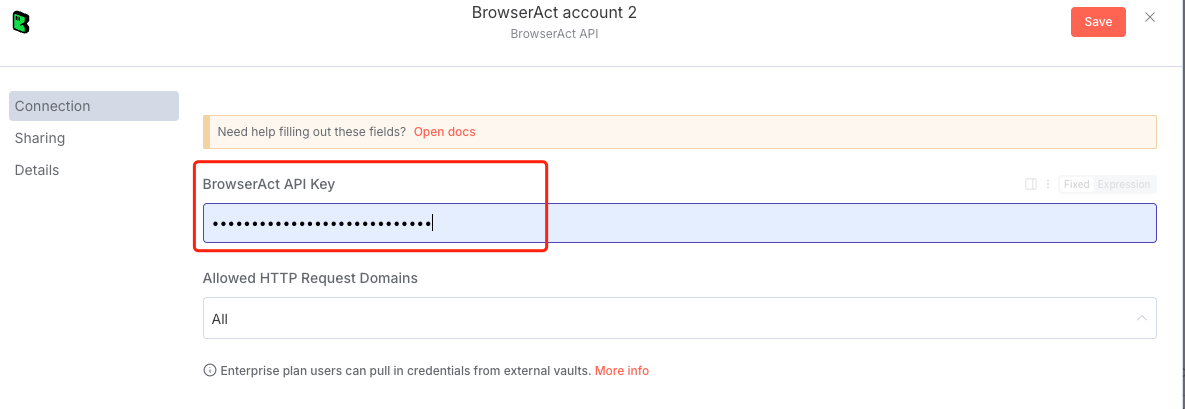
- Generate a new API Key
- Copy the generated API Key
- Return to n8n and paste the API Key into the BrowserAct node's credential field
- Save the credential configuration
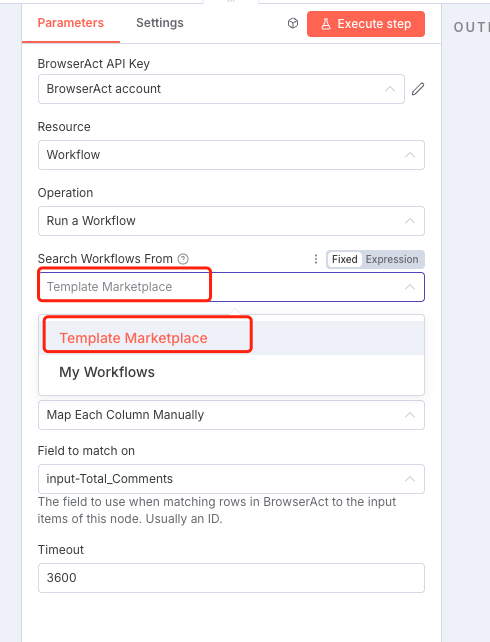
Step 6: Select Workflow Source
In the "Search Workflows From" dropdown, you have two options:
- Template Marketplace: Access publicly available workflow templates created by the BrowserAct community
- My Workflows: Use your private, custom-built BrowserAct workflows
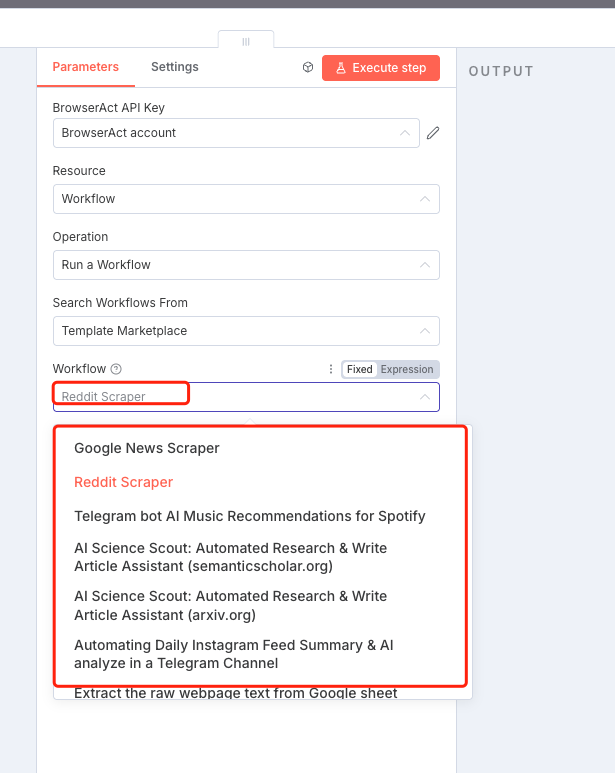
Step 7: Choose Your BrowserAct Workflow
Select the specific BrowserAct workflow you want to execute within your n8n automation.
Important Note on Output Formats:
BrowserAct workflows support the following output formats:
- CSV
- JSON
- XML
- Markdown (MD)
When building your BrowserAct workflow, ensure the output data format aligns with your n8n workflow requirements and any downstream nodes that will process the data.
Best Practices
- Format Compatibility: Always verify that your BrowserAct workflow's output format is compatible with subsequent nodes in your n8n workflow
- API Key Security: Store your API Key securely and never share it publicly
- Workflow Testing: Test your BrowserAct workflows independently before integrating them into complex n8n automations
- Error Handling: Implement appropriate error handling in your n8n workflow to manage potential scraping failures
Getting Started
With BrowserAct successfully configured in n8n, you're now ready to build powerful automated web scraping workflows. You can:
- Extract data from multiple websites automatically
- Schedule regular data collection tasks
- Process and transform scraped data using n8n's extensive node library
- Integrate web scraping results with other applications and services
Next Steps
- Create or select a BrowserAct workflow optimized for your data extraction needs
- Configure your n8n workflow to process the scraped data
- Set up triggers and schedules for automated execution
- Monitor and optimize your workflow performance
Video walkthrough
Need help?
Contact BrowserAct support or consult our documentation for more automation tips.
- Discord: [Discord Community]
- E-mail: service@browseract.com

Relative Resources

How to Share and Use Workflows in n8n Using JSON Files

How to Share and Use Workflows in Make Using JSON Files

How to Set Up LinkedIn Two-Factor Authentication in BrowserAct

Unlock Powerful Automation with BrowserAct Integrations
Latest Resources

BrowserAct vs Skyvern: Open-Source Browser Agent vs Managed Workflow

BrowserAct vs Selenium in 2026: Is It Time to Move On?

BrowserAct CAPTCHA Handling vs 2Captcha vs CapSolver: Real Cost Comparison
